Order Labels for Magento 2 - User Guide
The Order Labels extension lets you attach color-coded labels to orders and show them as columns in the Magento order grid. This guide covers installation, creating label columns, creating labels (Static, Dynamic, and Predefined), styling them, setting auto-assignment rules and visibility, and viewing labels in the order grid.
Extension Installation
Extract the ZIP file and upload the extension to the root of your Magento 2 directory via FTP.
Log in to your server via SSH and run:
php bin/magento setup:upgrade
Deploy static content (both methods)
Magento 2.0.x to 2.1.x
php bin/magento setup:static-content:deployMagento 2.2.x and above
php bin/magento setup:static-content:deploy -f
Flush the cache
php bin/magento cache:flush
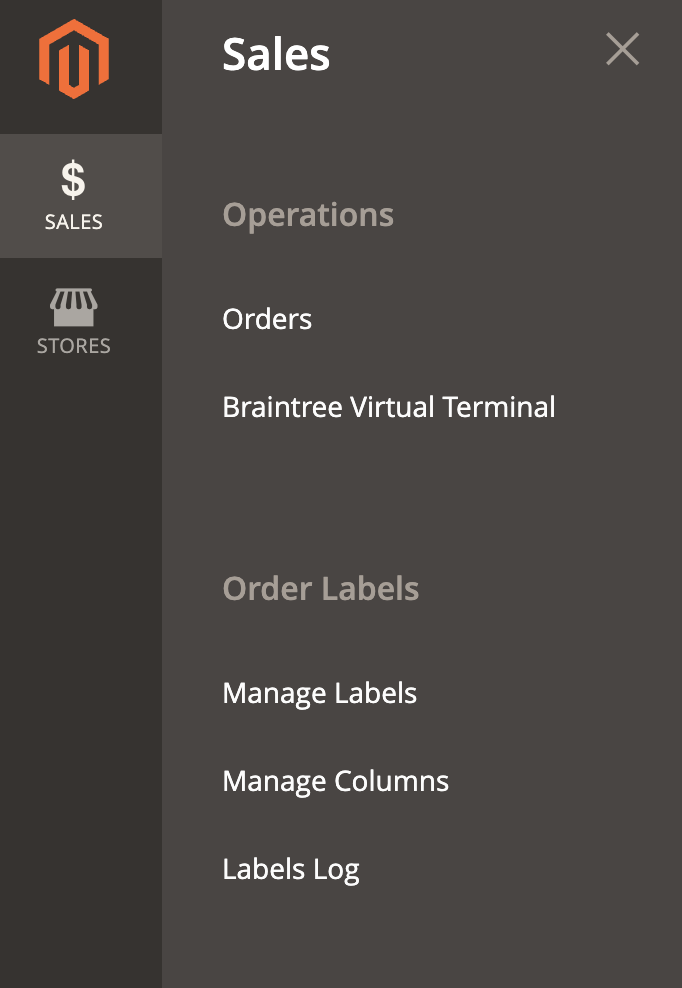
After installation, the extension adds an Order Labels menu with three sections:
- Manage Labels: create and edit the labels themselves.
- Manage Columns: create the grid columns that hold labels.
- Labels Log: review label activity.
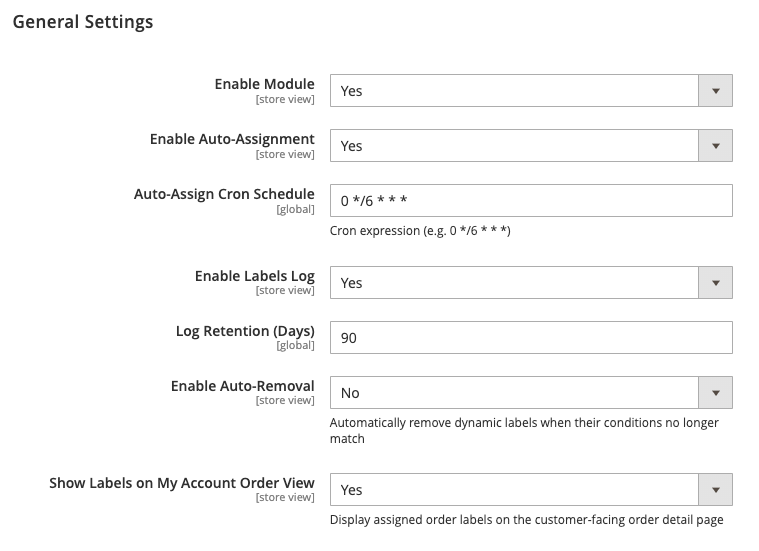
Before creating labels, set the extension's global options. Go to Stores > Configuration > Order Labels > General Settings and configure:
General Settings
Configure the fundamental operations, cron schedules, logs, and frontend visibility for order labels:
Enable Module: Select Yes to activate the Order Labels extension or No to disable it.
Enable Auto-Assignment: Choose Yes to allow Magento to assign labels to orders automatically based on predefined rules.
Auto-Assign Cron Schedule: Enter the cron expression (e.g.,
0 */6 * * *) that specifies how often auto-assignment runs in the background.Enable Labels Log: Enable or disable logging of label assignments and activity for audit purposes.
Log Retention (Days): Specify the number of days (e.g.,
90) to retain log records before they are automatically purged.Enable Auto-Removal: Set to Yes to automatically strip dynamic labels from orders once their underlying conditions no longer match.
Show Labels on My Account Order View: Choose Yes to display assigned order labels directly to customers on the frontend Order Details page in their account dashboard.
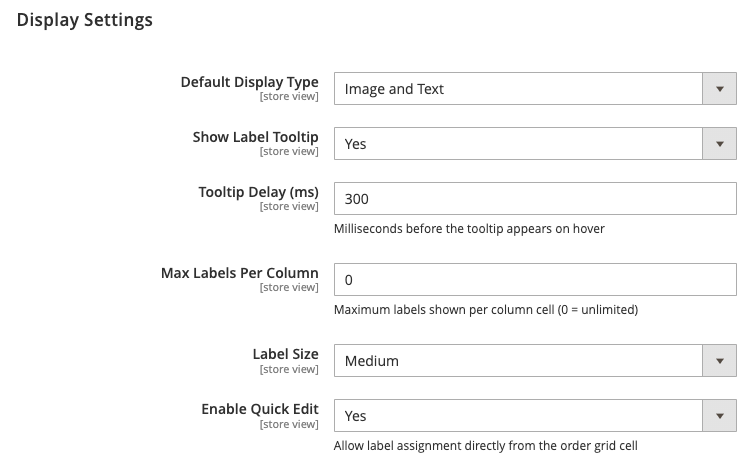
Display Settings
Control the visual presentation and behavior of labels in the Magento admin order grid:
Default Display Type: Select how labels render in the grid (e.g., Image and Text, Image Only, or Text Only).
Show Label Tooltip: Choose Yes to display a descriptive tooltip when an admin hovers over a label in the grid.
Tooltip Delay (ms): Set the hover delay in milliseconds (e.g.,
300) before the tooltip appears.Max Labels Per Column: Define the maximum number of labels displayed in a single order grid cell. Enter
0for unlimited.Label Size: Select the display size of the label badges (e.g., Medium, Small, or Large).
Enable Quick Edit: Set to Yes to allow administrators to assign or remove labels directly from the order grid cells without opening the full order view.
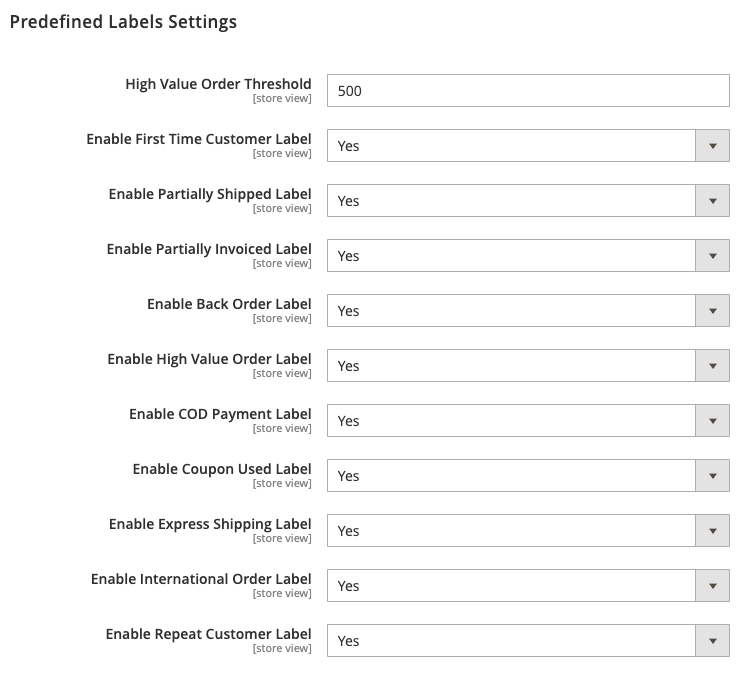
Predefined Labels Settings
Quickly flag standard order conditions using built-in, automated label rules:
High Value Order Threshold: Enter the minimum order total (e.g.,
500) required to trigger the High Value label.Enable First Time Customer Label: Automatically tags orders placed by brand-new accounts or first-time guest emails.
Enable Partially Shipped Label: Assigns a label when only a portion of the order items have been shipped.
Enable Partially Invoiced Label: Flags orders that have partial invoices generated.
Enable Back Order Label: Flags orders containing items purchased on backorder.
Enable High Value Order Label: Enables the automatic label for orders meeting or exceeding the configured threshold.
Enable COD Payment Label: Identifies orders placed using the Cash on Delivery payment method.
Enable Coupon Used Label: Tags orders where a discount coupon code was applied at checkout.
Enable Express Shipping Label: Flags orders that selected express or expedited shipping methods.
Enable International Order Label: Highlights orders with destination addresses outside your domestic store country.
Enable Repeat Customer Label: Tags orders placed by returning buyers with previous order history.
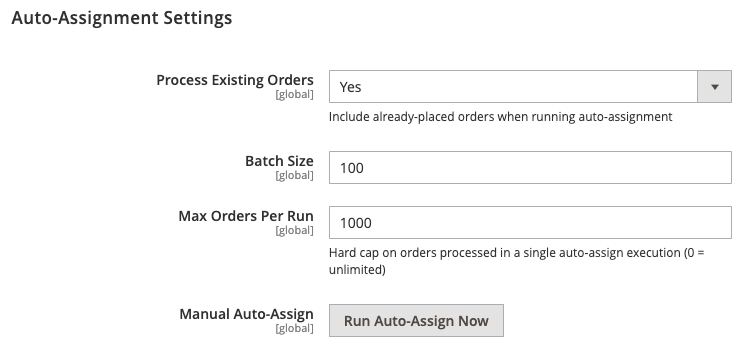
Auto-Assignment Settings
Manage the background processing queue and performance limits for rule-based label assignment:
Process Existing Orders: Set to Yes to include historical orders placed prior to module setup when running auto-assignment.
Batch Size: Define how many orders Magento processes in a single memory batch (e.g.,
100) to avoid memory overhead.Max Orders Per Run: Set a hard ceiling on the total number of orders evaluated during a single cron execution (e.g.,
1000). Set to0for no limit.Manual Auto-Assign: Click the Run Auto-Assign Now button to immediately evaluate order conditions and assign labels without waiting for the scheduled cron run.
1. Create Label Columns
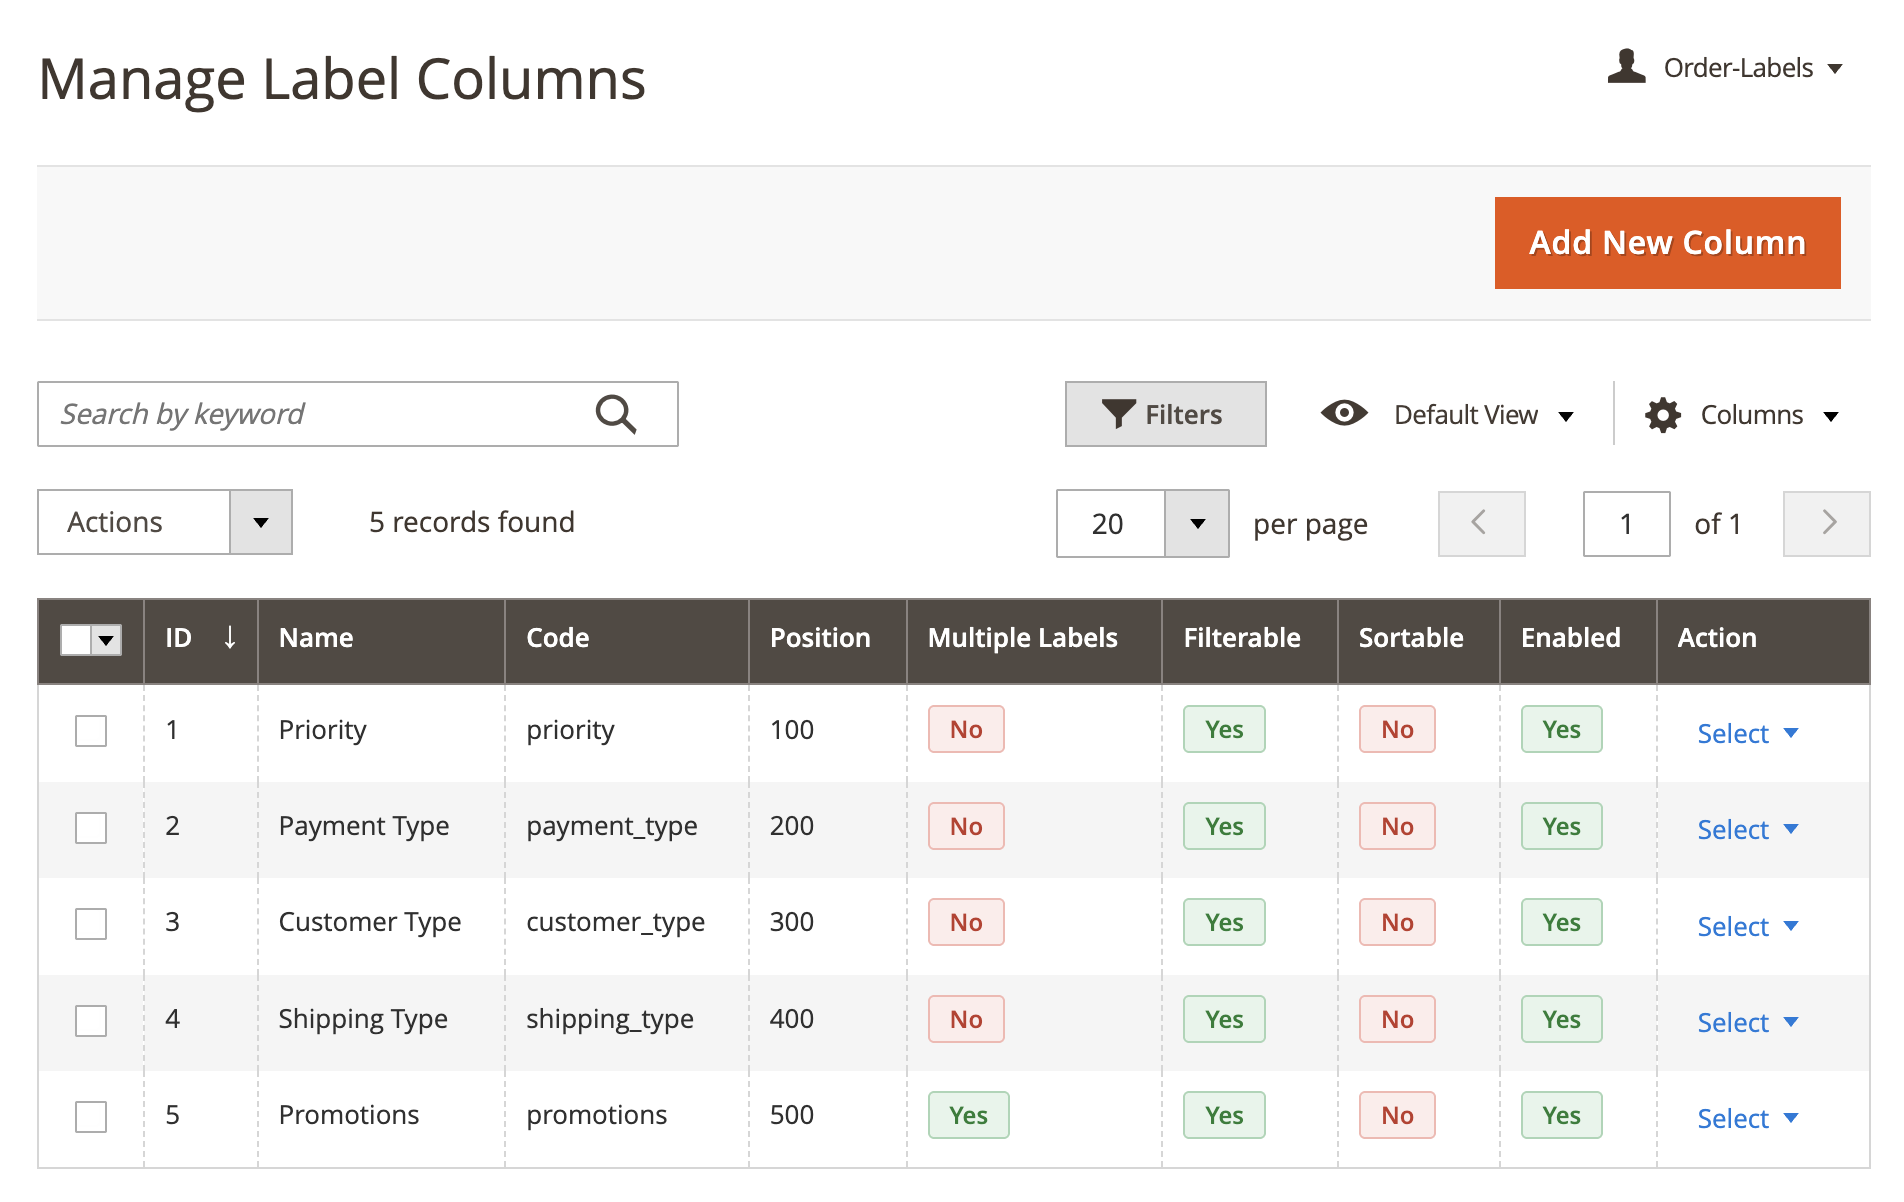
Labels are displayed inside columns in the order grid, so create your columns first. Go to Order Labels > Manage Columns to see the list of existing columns, then click Add New Column.
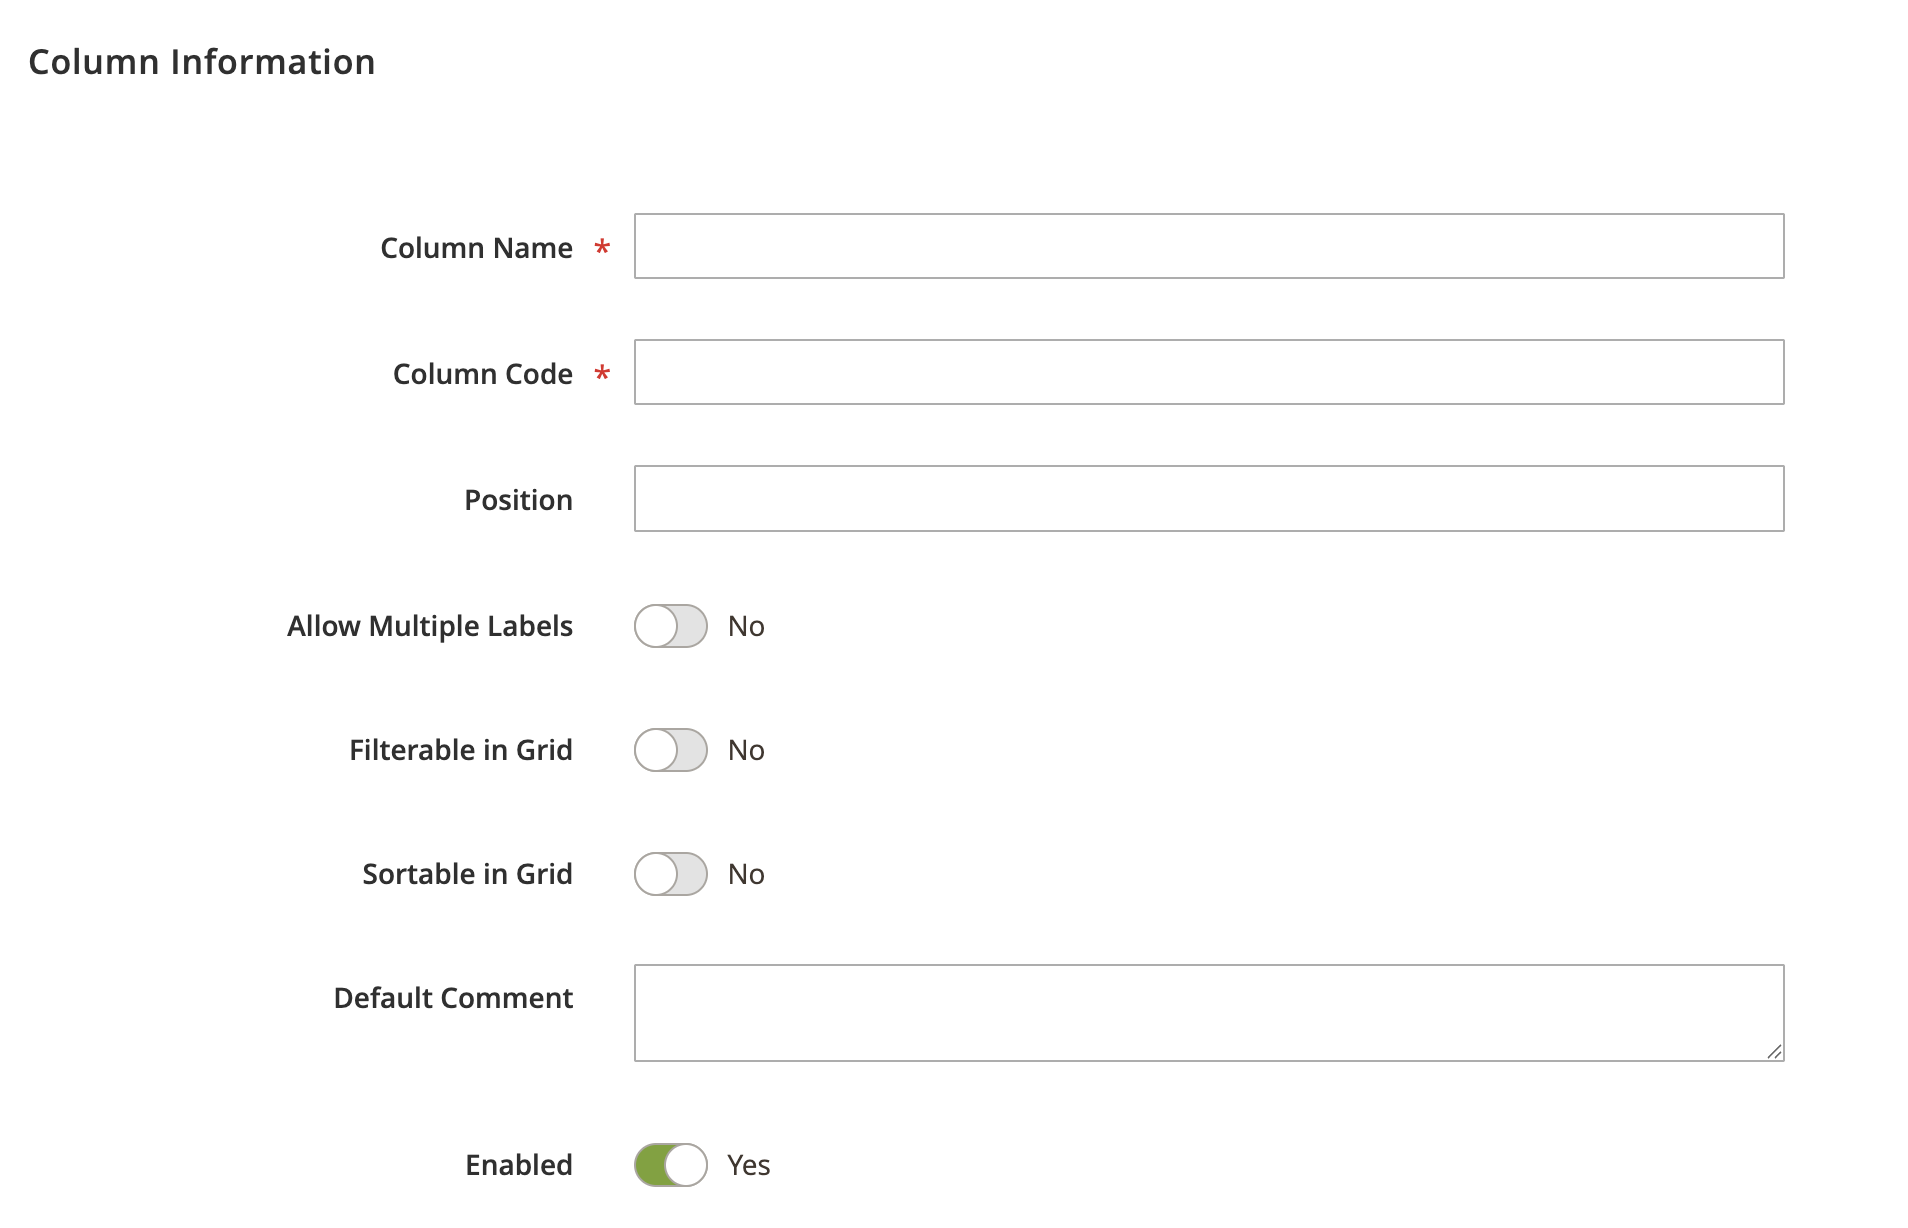
In the Column Information section, configure:
- Column Name: the column label shown in the order grid (required).
- Column Code: a unique identifier for the column (required).
- Position: the order in which the column appears among other label columns. Lower numbers appear first.
- Allow Multiple Labels: set to Yes to let a single column hold more than one label on the same order.
- Filterable in Grid: set to Yes to allow filtering the order grid by this column's labels.
- Sortable in Grid: set to Yes to allow sorting the order grid by this column.
- Default Comment: an optional comment associated with the column.
- Enabled: turn the column on or off without deleting it.
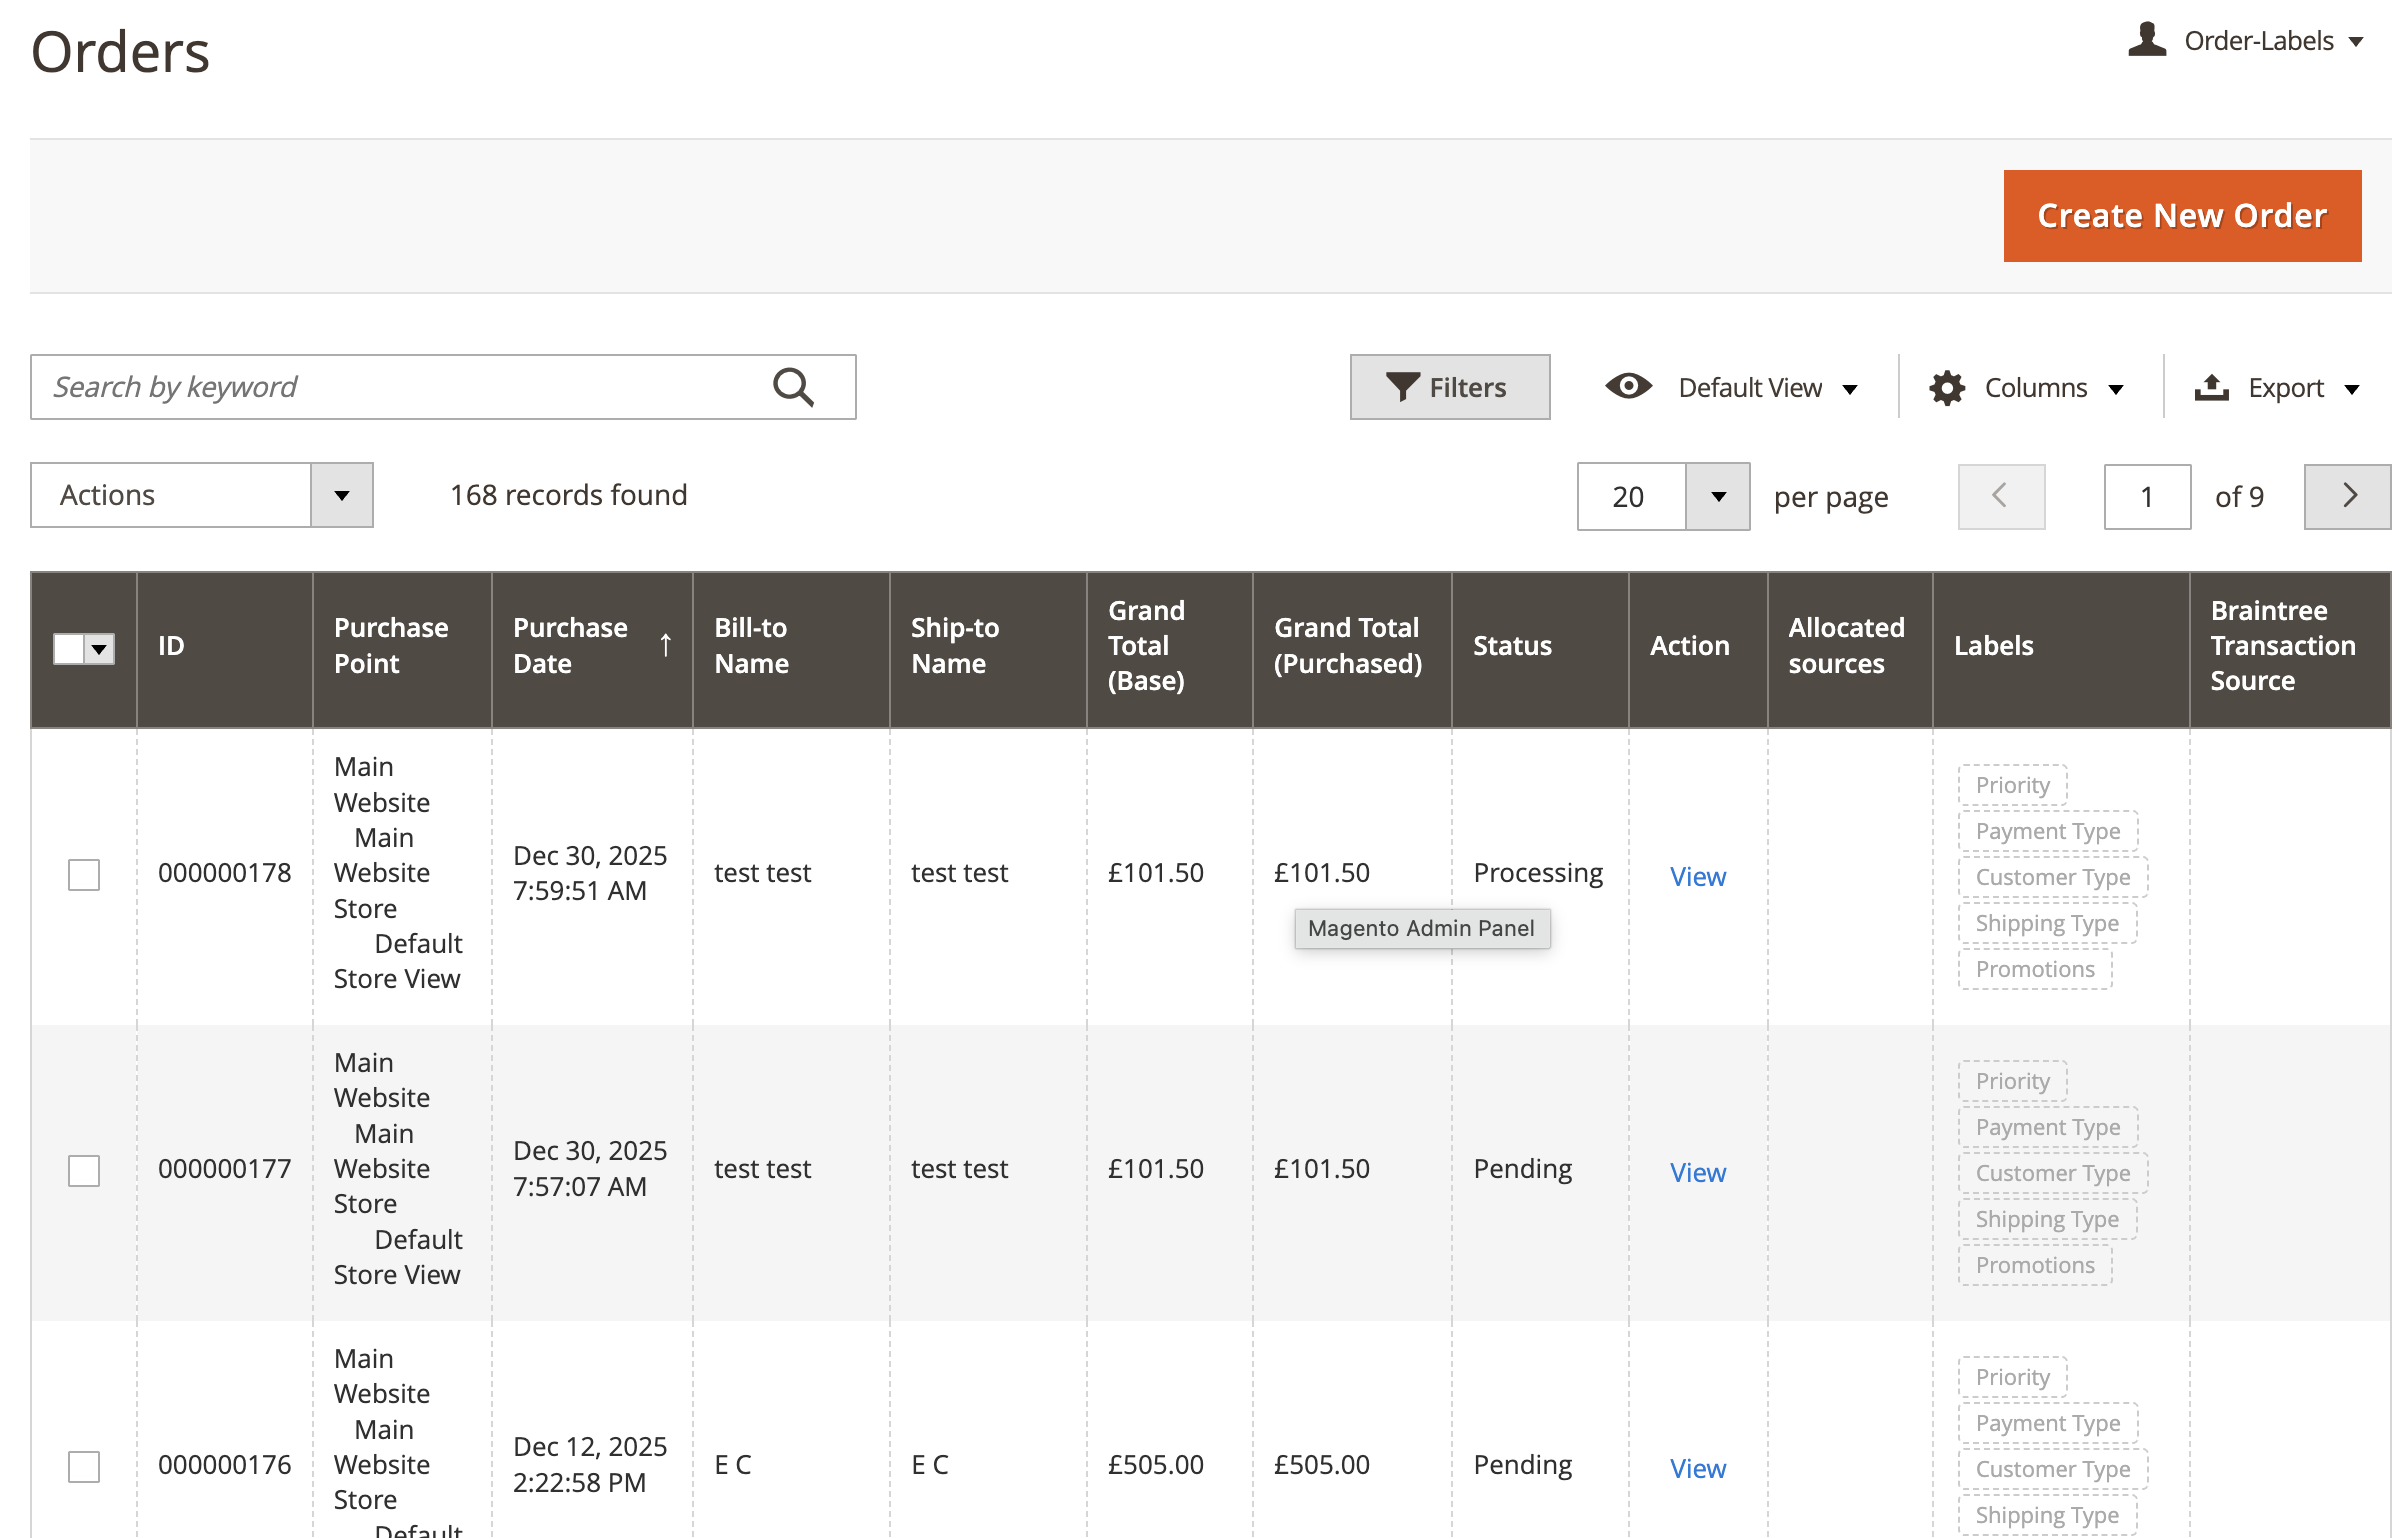
Save the column. Repeat for each column you need, for example Priority, Payment Type, Customer Type, Shipping Type, or Promotions.
2. Create Labels
Go to Order Labels > Manage Labels to see existing labels, then click Add New Label.
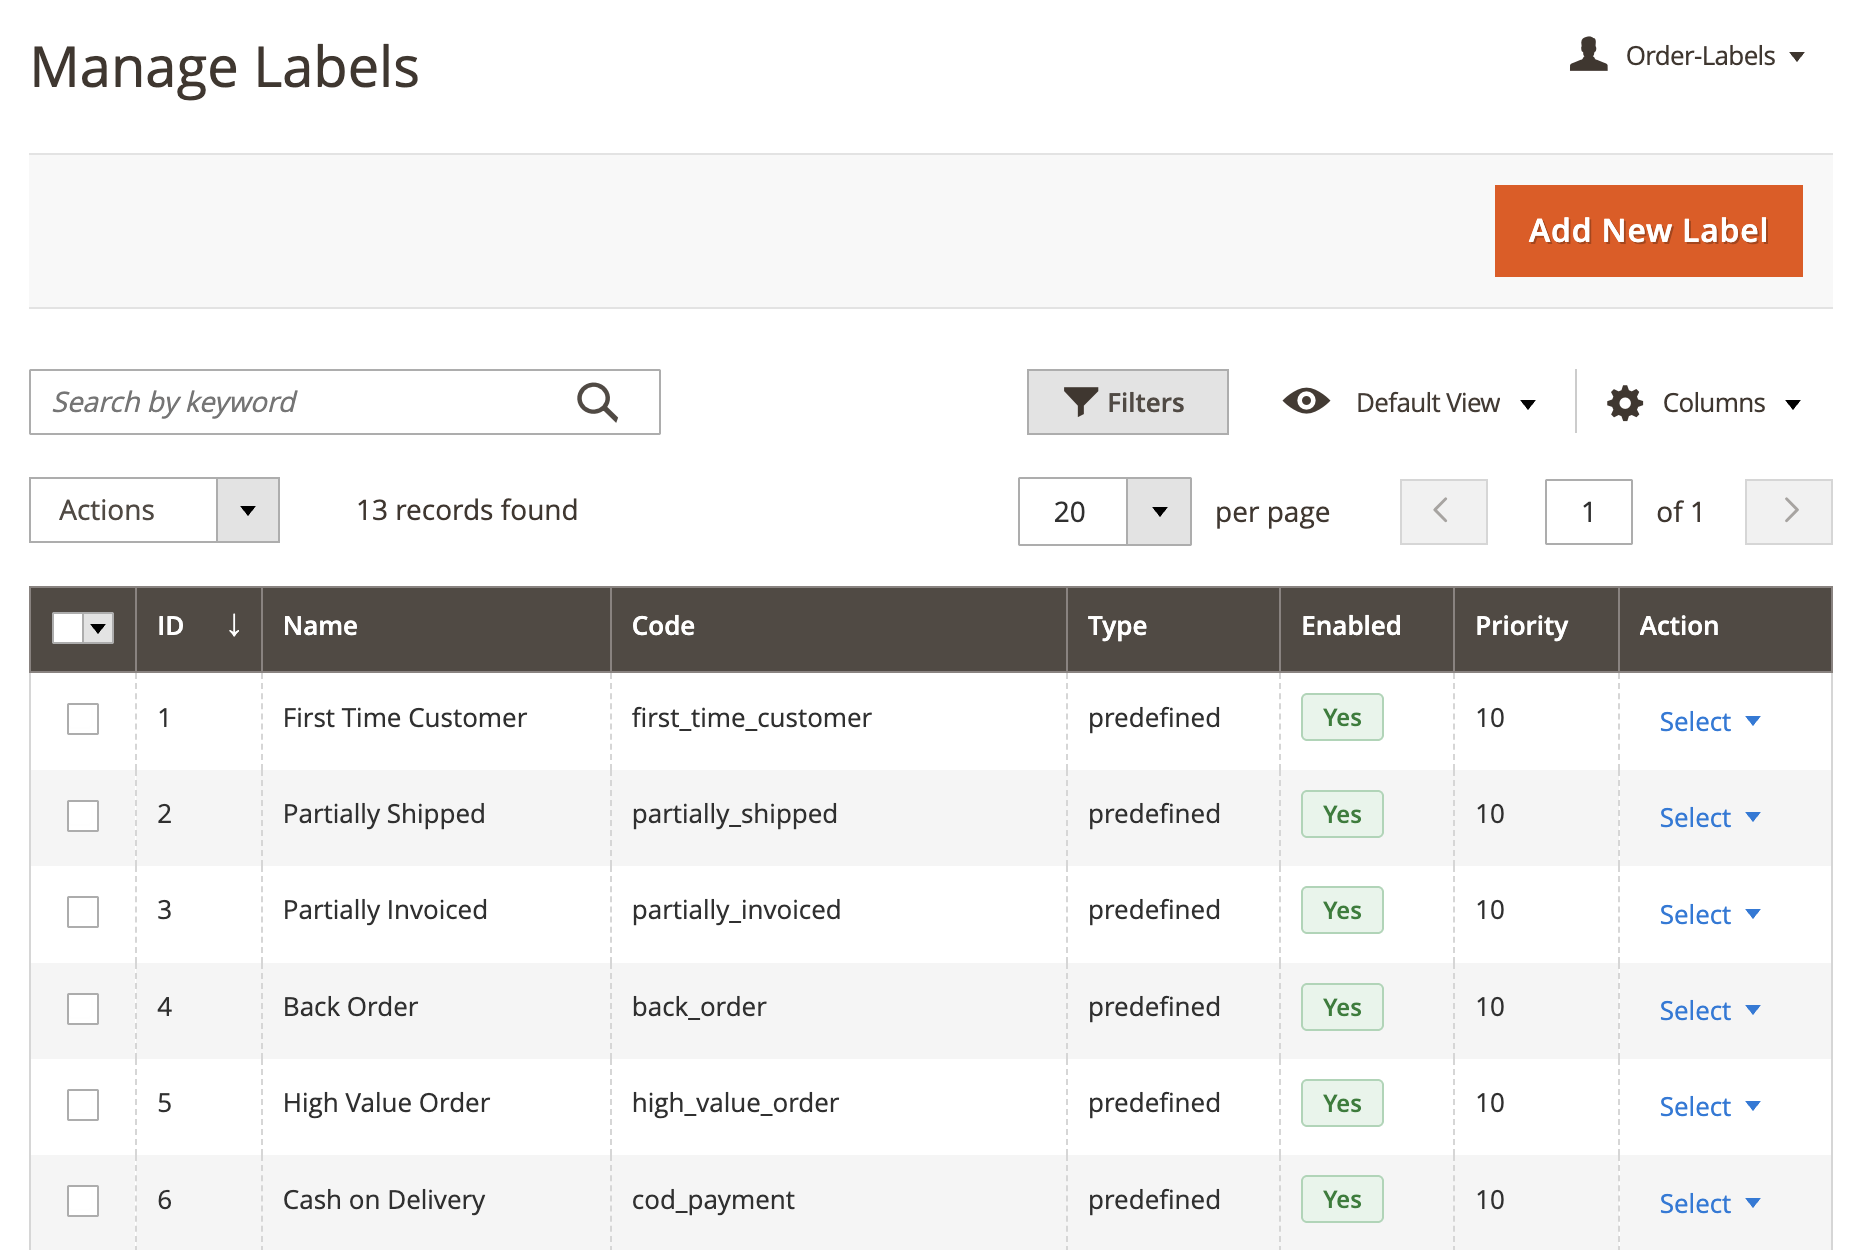
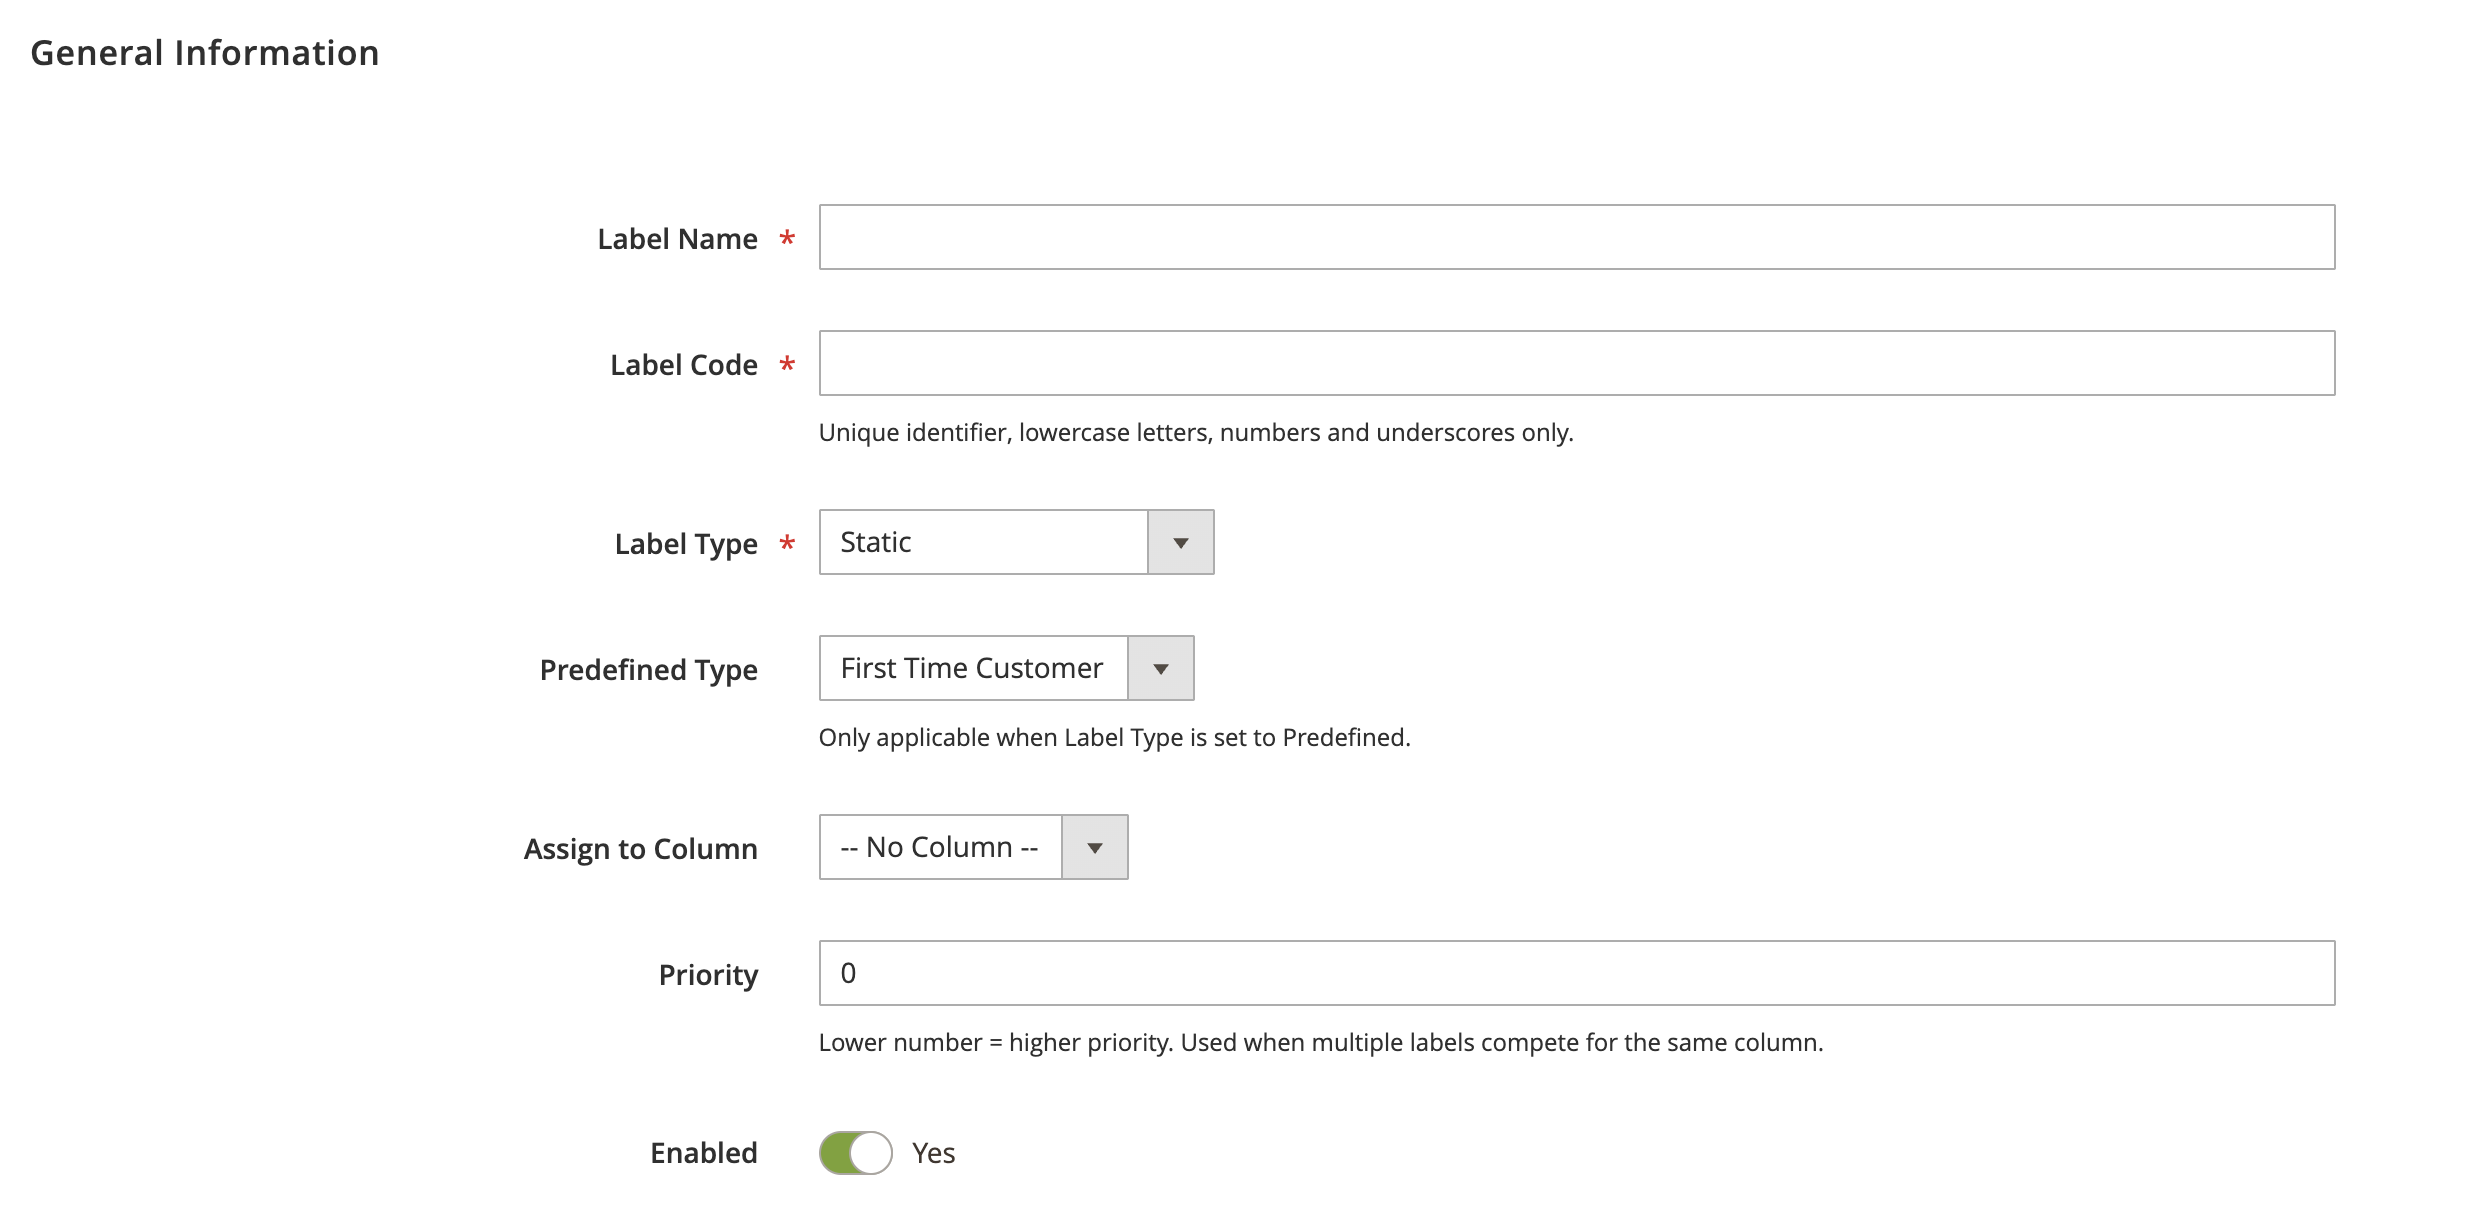
2.1 General Information
- Label Name: the name of the label (required).
- Label Code: a unique identifier. Use lowercase letters, numbers, and underscores only (required).
- Label Type: choose one (required):
- Static: applied manually to specific orders.
- Dynamic (Rule-Based): assigned automatically when an order matches the conditions you set.
- Predefined: a ready-made label for a common scenario.
- Predefined Type: choose the preset to use. This applies only when Label Type is set to Predefined.
- Assign to Column: select which column this label appears in, or leave as No Column.
- Priority: a number used when multiple labels compete for the same column. Lower number means higher priority.
- Enabled: turn the label on or off.
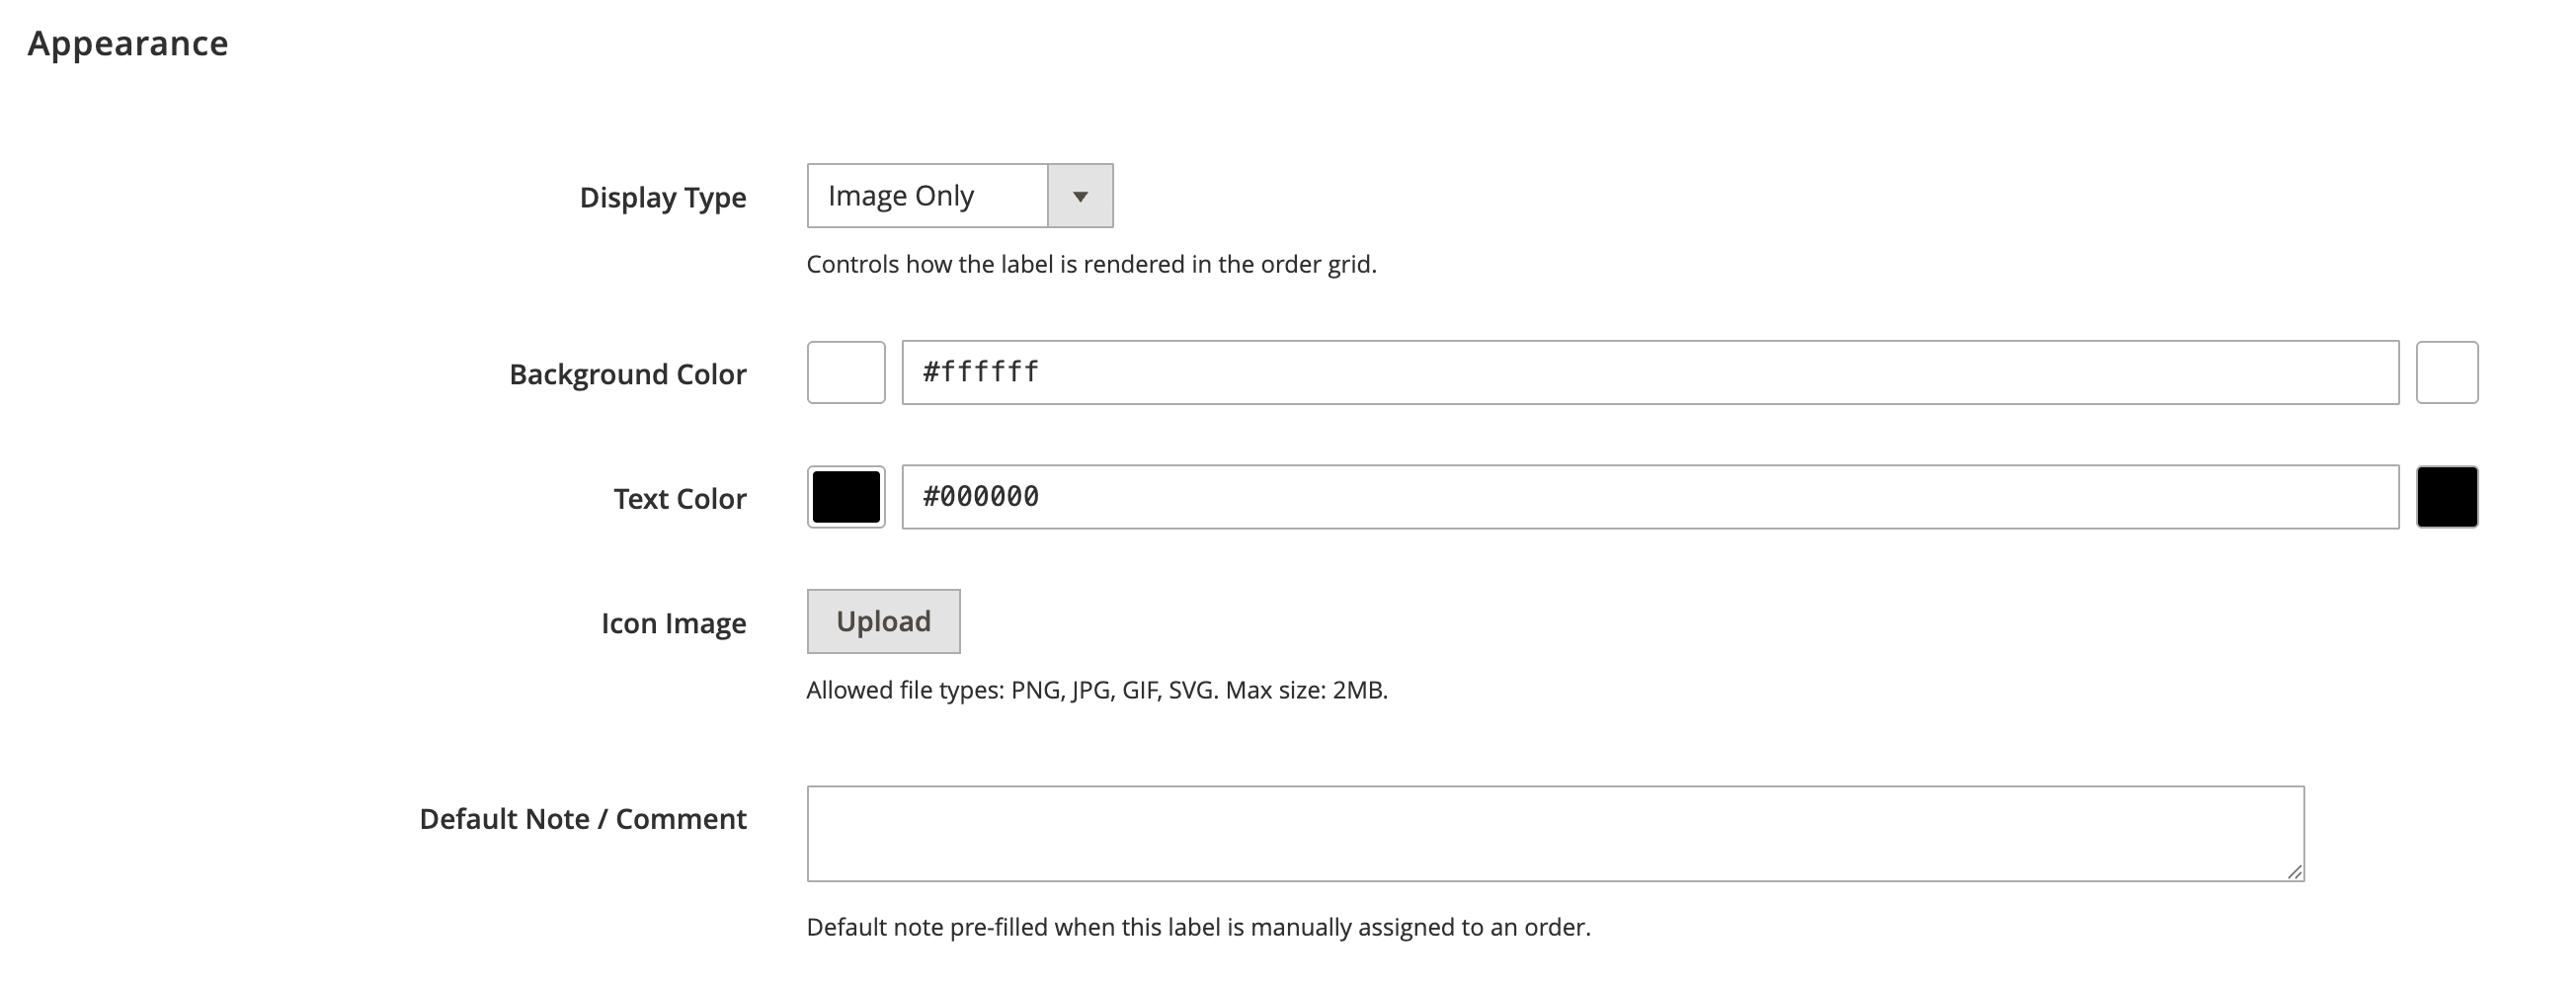
2.2. Appearance
Style how the label looks in the order grid:
- Display Type: choose how the label renders: Image Only, Text Only, Image and Text, or Text and Image.
- Background Color: set the label's background color with the color picker or a hex value.
- Text Color: set the label's text color with the color picker or a hex value.
- Icon Image: upload an icon for the label. Allowed file types are PNG, JPG, GIF, and SVG, up to 2MB.
- Default Note / Comment: text that is pre-filled when this label is manually assigned to an order.
2.3. Auto-Assignment
- Auto-Remove When Conditions No Longer Match: set to Yes to clear the label automatically once an order no longer matches its conditions. This applies only to Dynamic (Rule-Based) labels.
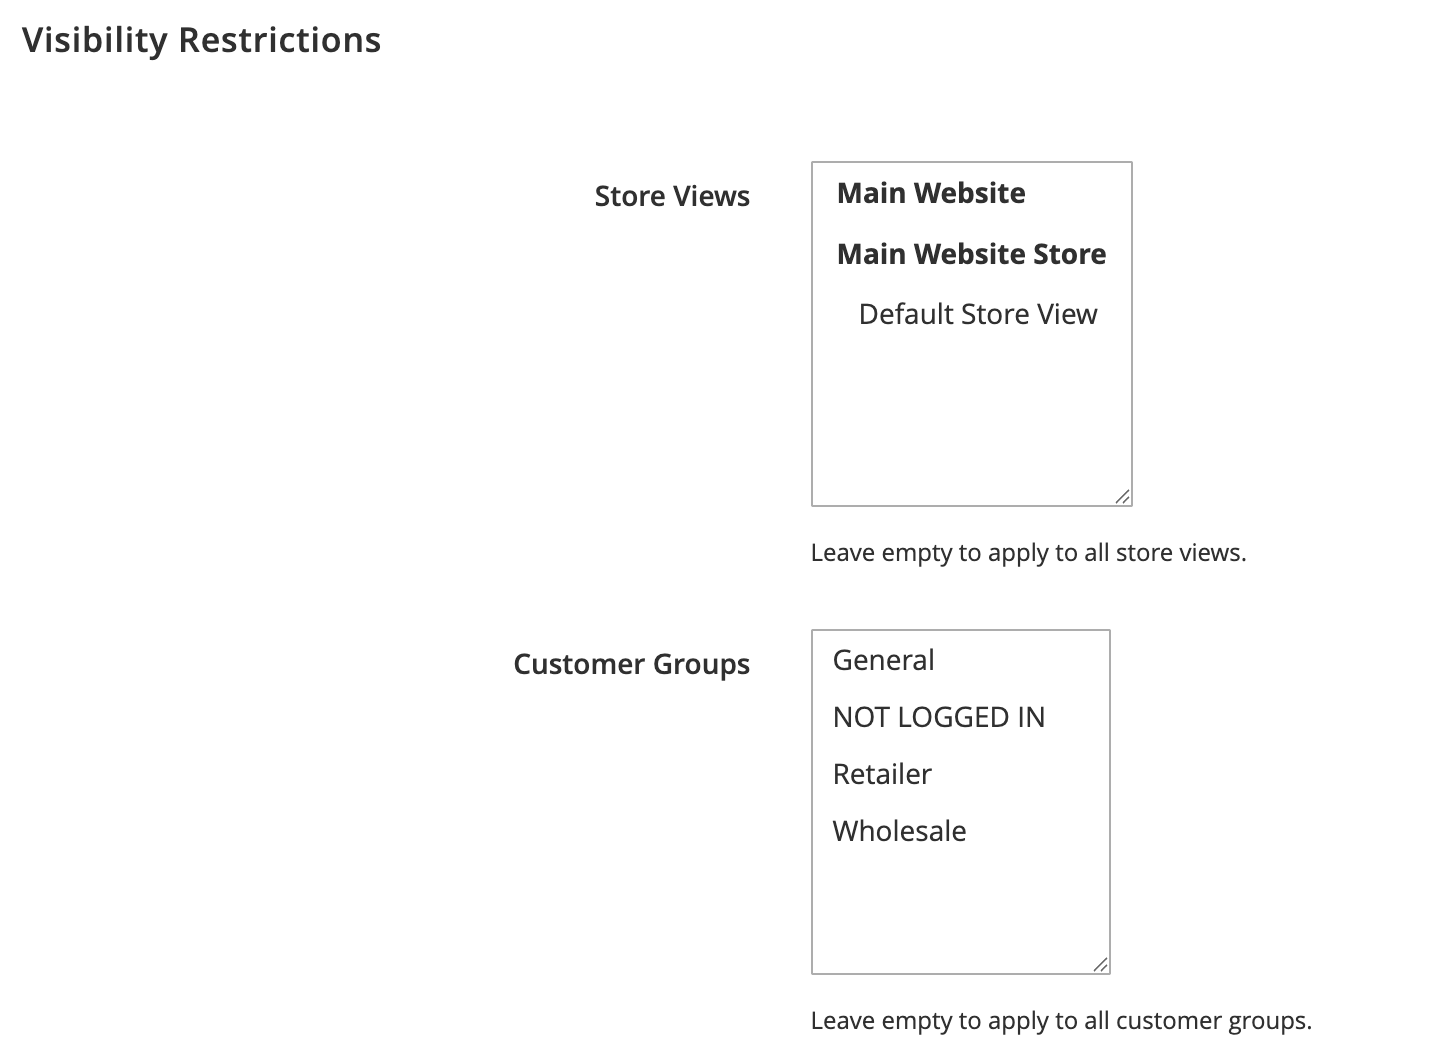
2.4. Visibility Restrictions
- Store Views: select the store views where this label applies. Leave empty to apply to all store views.
- Customer Groups: select the customer groups this label applies to, such as General, NOT LOGGED IN, Retailer, or Wholesale. Leave empty to apply to all customer groups.
2.5 Conditions (for Dynamic labels)
For a Dynamic (Rule-Based) label, define when it should be applied in the Conditions section. Under Apply Label If, choose whether ALL or ANY of the conditions must be true, then add conditions using the plus icon, for example "Status is Complete". Remove a condition with the red icon.
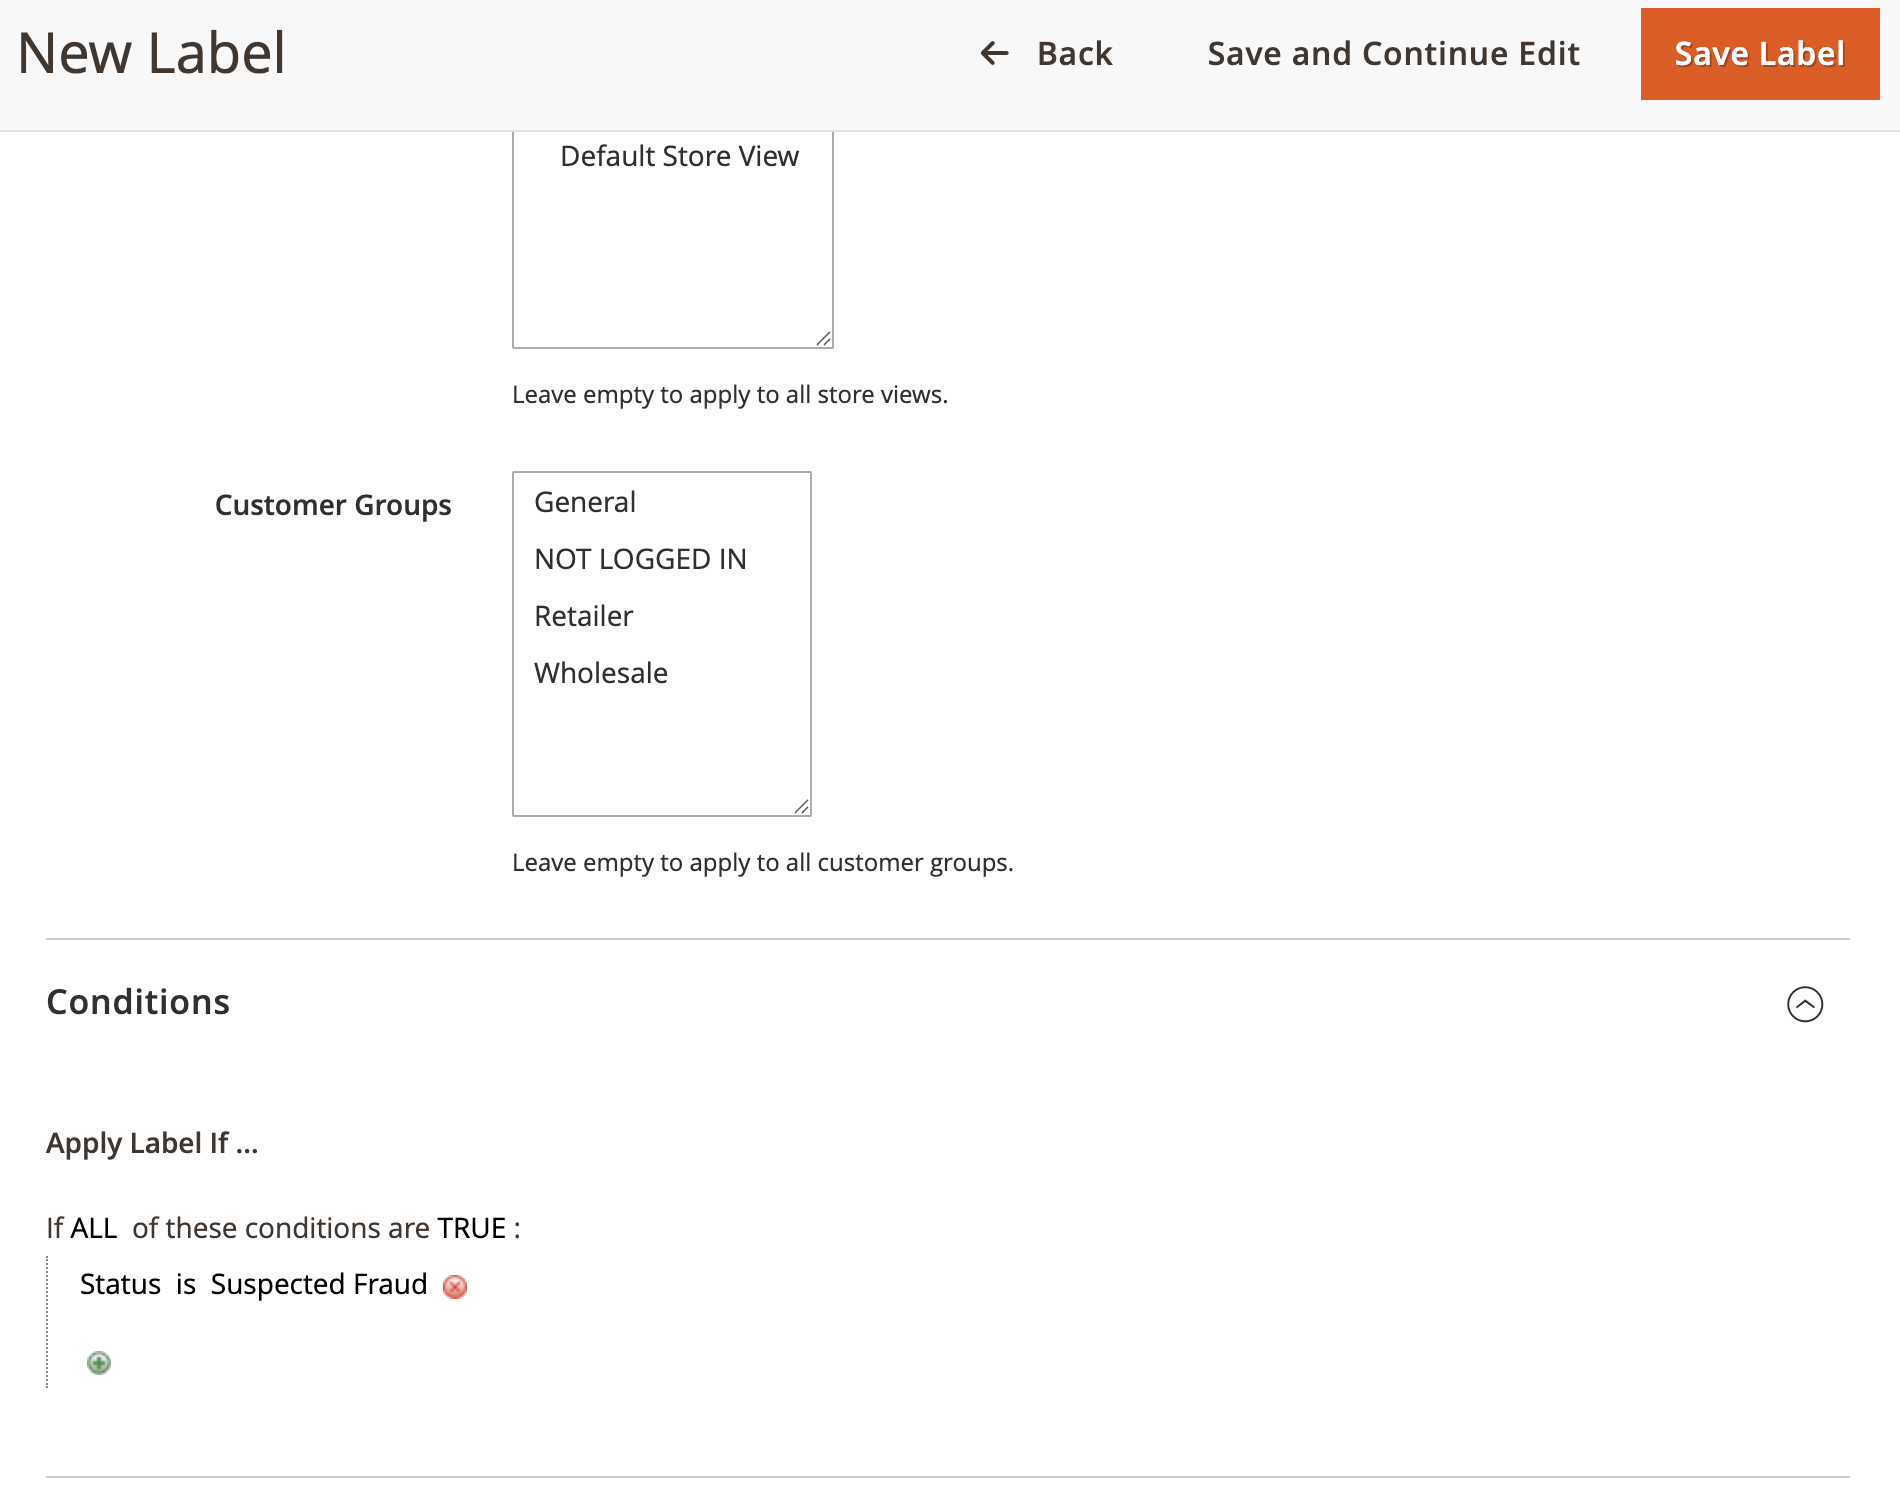
Save the label. Dynamic labels are then applied automatically to matching orders, Predefined labels follow their preset behavior, and Static labels are ready to assign manually.
3. Predefined Label Types
The extension ships with predefined labels for common scenarios, including:
- First Time Customer
- Repeat Customer
- Partially Shipped
- Partially Invoiced
- Back Order
- High Value Order
- Cash on Delivery
- International
Select the one you need from the Predefined Type dropdown when Label Type is set to Predefined.
4. Labels in the Order Grid
Once labels and columns are set up, open Sales > Orders. Each label column you created appears in the grid, and orders show their assigned labels in those columns. If a column is filterable or sortable, you can filter and sort the order grid by its labels to segment orders quickly.
5. Labels Log
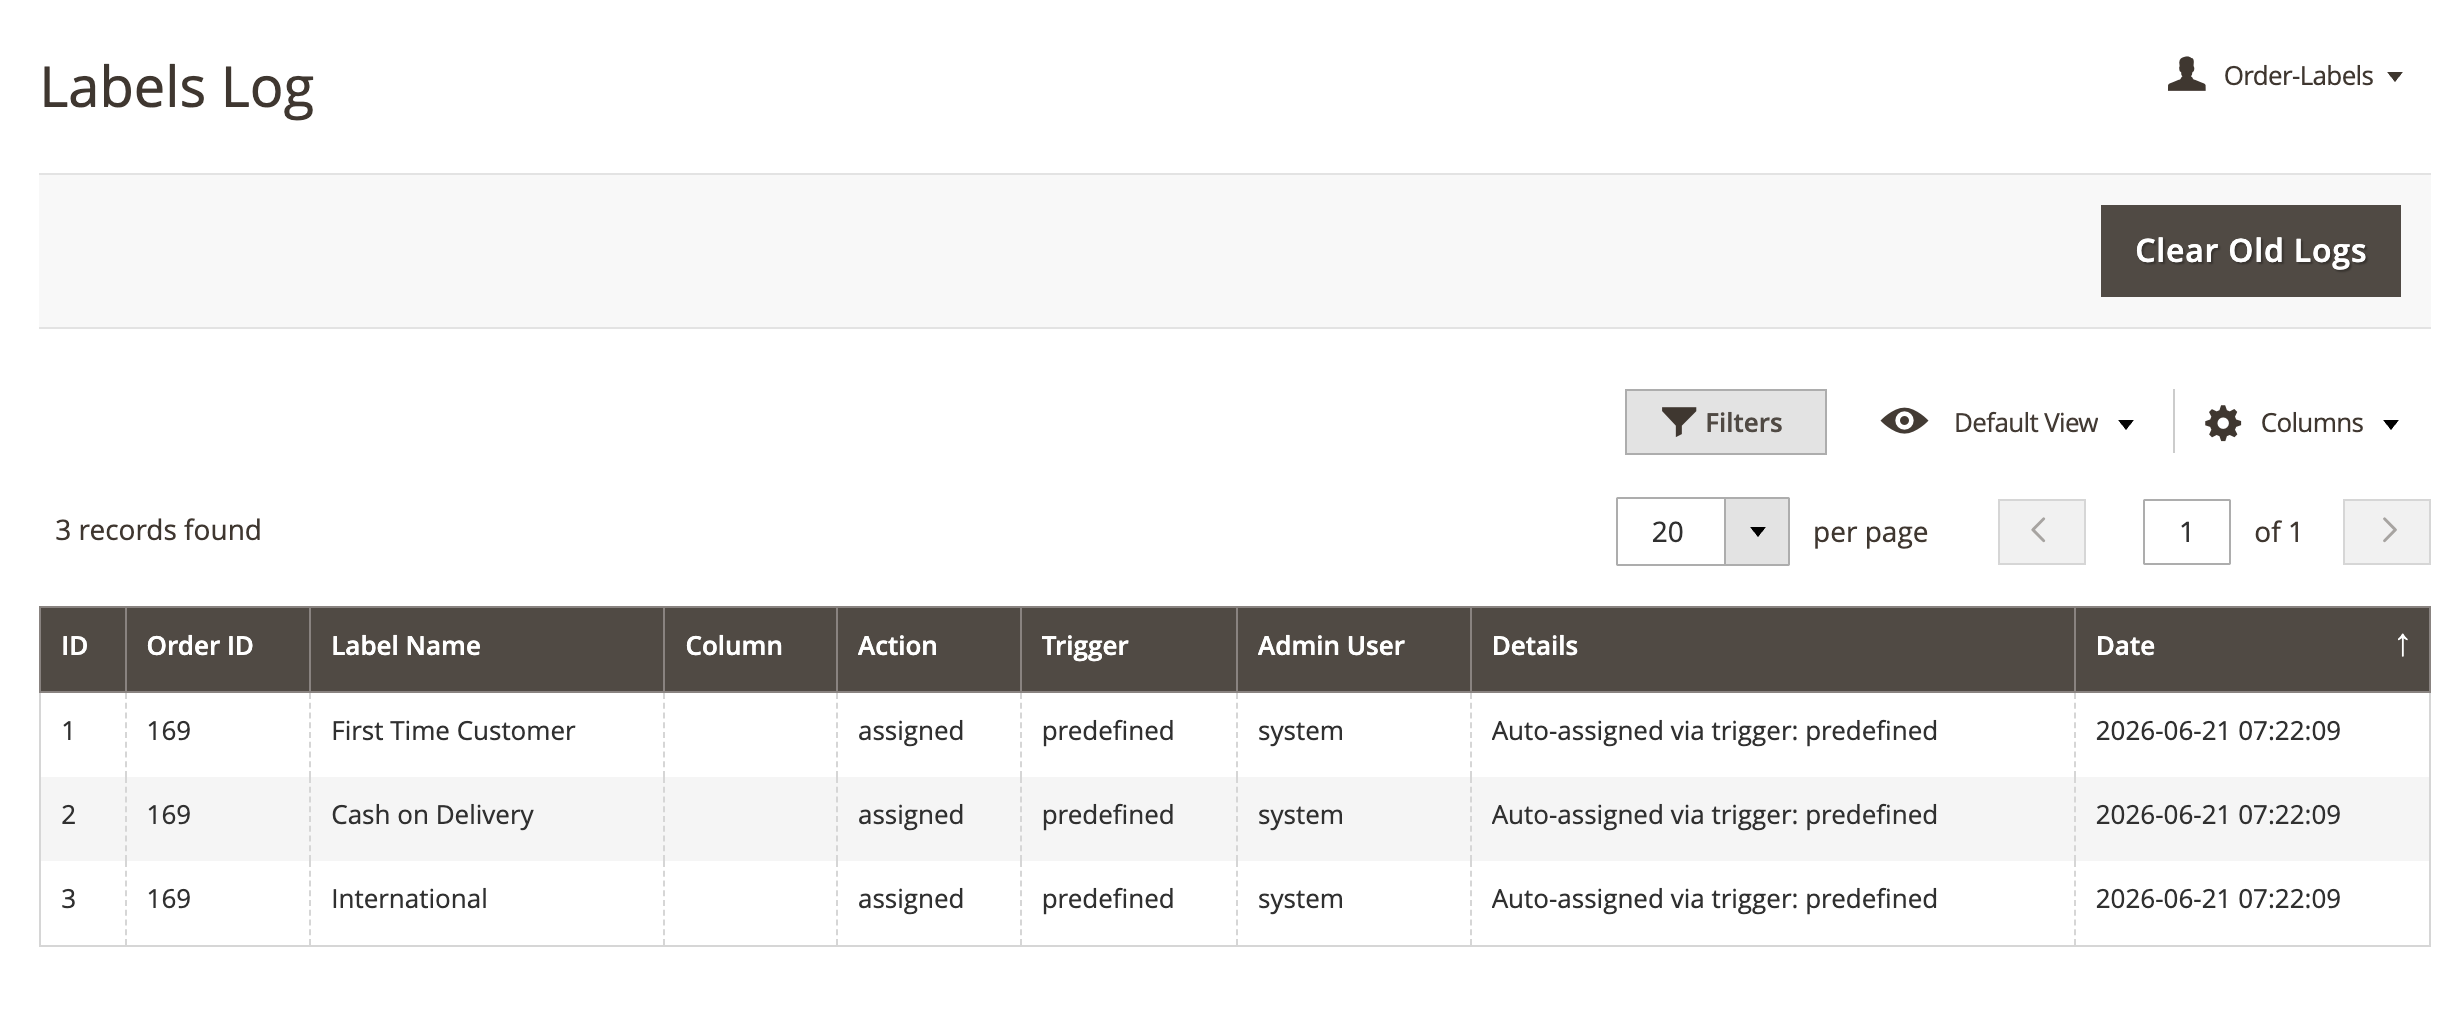
Go to Order Labels > Labels Log to review the history of label activity across your orders.