Age Verification Popup for Magento 2 - User Guide
Extension Installation
Extract the ZIP file and upload the extension to the root of your Magento 2 directory via FTP.
Log in to your server via SSH and run the following commands step by step:
php bin/magento setup:upgrade
Deploy static content:
Magento 2.0.x – 2.1.x
php bin/magento setup:static-content:deployMagento 2.2.x & above
php bin/magento setup:static-content:deploy \-f
Flush the cache:
php bin/magento cache:flush
Configuration
To configure the Age Verification for Magento 2 extension, log in to Magento 2, move to Age Verification Configuration where you can find various settings to configure the extension.
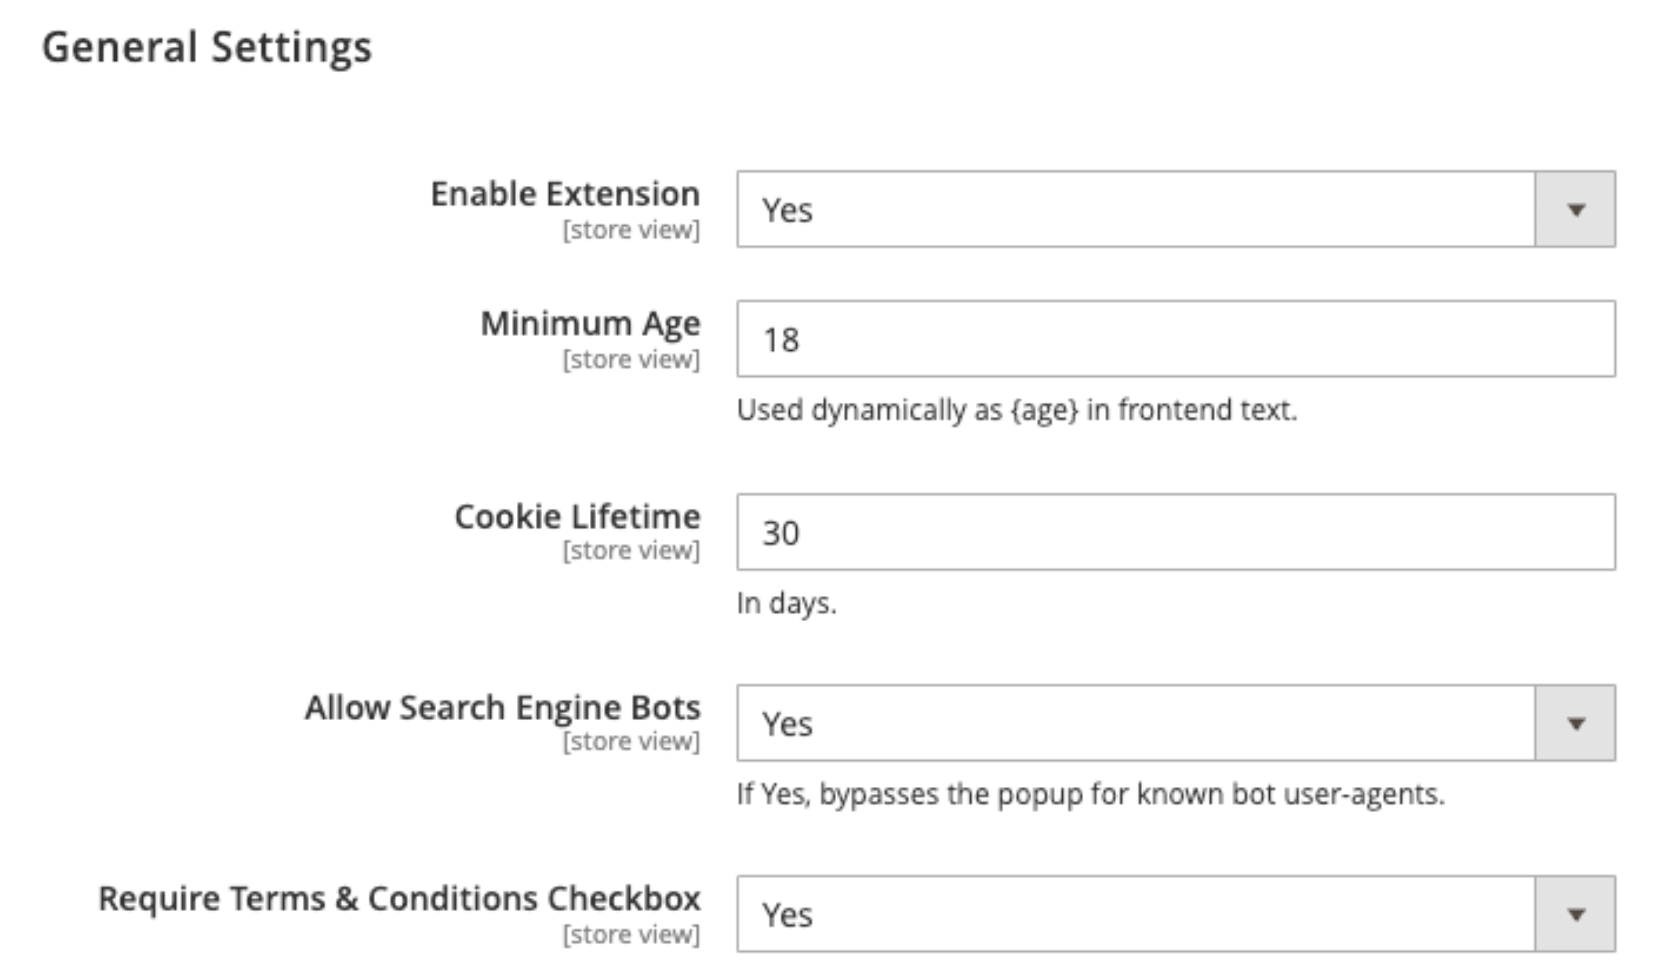
- Enable Extension: Enable or disable the Age Verification extension.
- Minimum Age: Set the minimum required age to access your store (e.g., 18 or 21). This value can be displayed dynamically in your text content using the
{age}variable. - Allow Search Engine Bots: Set YES to automatically bypass the popup for recognized search engine crawlers (Googlebot, Bingbot, etc.), ensuring your SEO is not negatively affected.
- Cookie Lifetime (Days): Define how many days the verification cookie should last before the user is prompted to verify their age again.
- Require Terms & Conditions Checkbox: Set YES to force users to explicitly check a consent box before they can click the confirmation button.
Content Customization
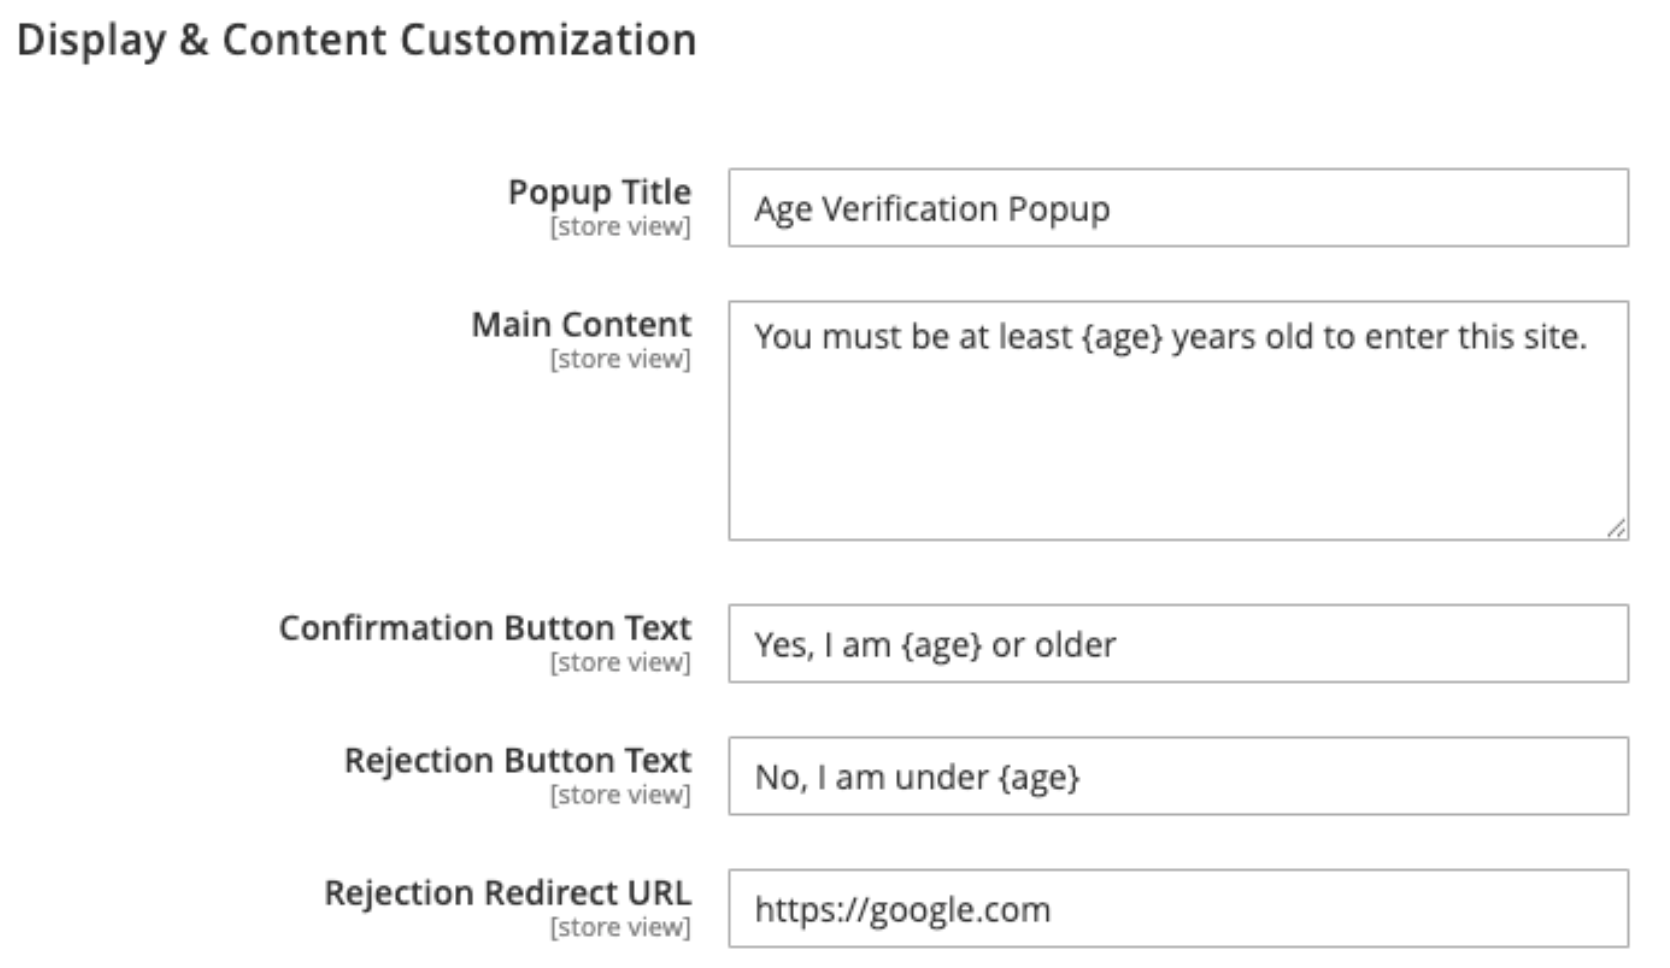
Customize the text presented to your users to perfectly match your brand's tone.
- Popup Title: Enter the primary heading for the popup (e.g., "Age Verification").
- Main Content: Enter the descriptive text asking the user to verify their age. Use the
{age}variable to automatically inject the configured minimum age. - Confirmation Button Text: Define the text for the positive action button (e.g., "I am {age} or older - Enter").
- Rejection Button Text: Define the text for the negative action button (e.g., "I am under {age} - Leave").
- Rejection Button URL: Define the URL, where the user will be taken if they click Reject.
Design & Styling
Build a cohesive, branded experience without writing a single line of CSS. The design section features an innovative Floating Live Preview widget that instantly updates as you adjust settings.
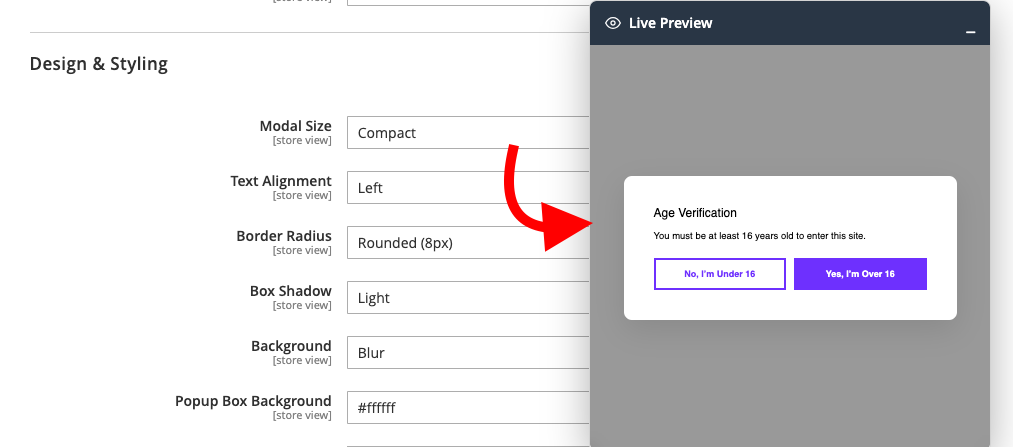 Live Preview: A floating widget anchored to the bottom right of your screen that shows you exactly what your popup will look like in real-time. You can drag it or minimize it.
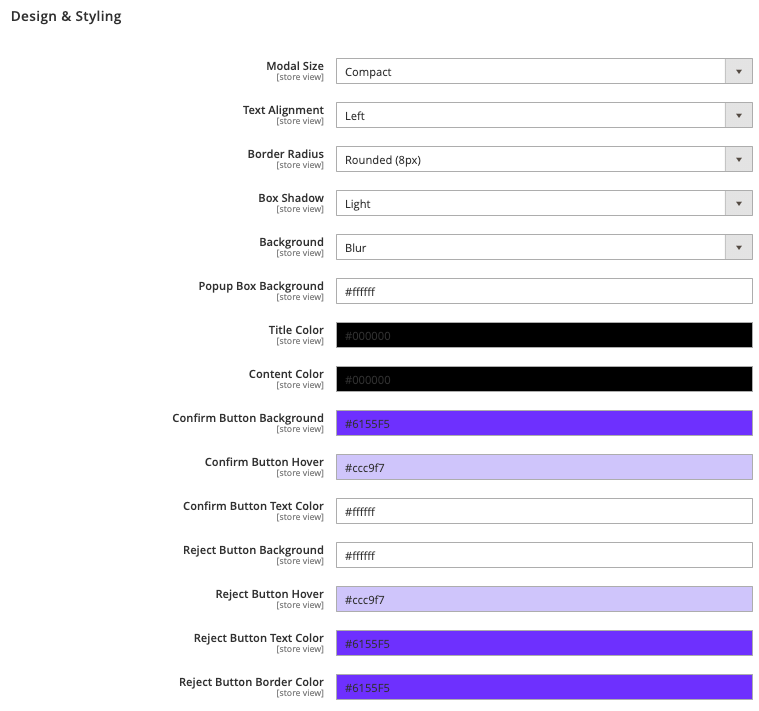
- Modal Size: Select the popup size as Compact or Full Screen.
- Text Alignment: Align the popup content to the Left, Center, or Right.
- Border Radius: Choose the corner style such as Square, Rounded (8px), or Pill.
- Box Shadow: Select the shadow intensity as None, Light, or Heavy.
- Background: Choose the background overlay effect as Overlay, Blur, or None.
- Popup Box Background: Set the background color of the age verification popup.
- Title Color: Set the color of the popup title.
- Content Color: Set the color of the main popup content.
- Confirm Button Background: Choose the background color for the confirmation button.
- Confirm Button Hover: Set the background color displayed when users hover over the confirmation button.
- Confirm Button Text Color: Set the text color of the confirmation button.
- Reject Button Background: Choose the background color for the rejection button.
- Reject Button Hover: Set the background color displayed when users hover over the rejection button.
- Reject Button Text Color: Set the text color of the rejection button.
- Reject Button Border Color: Set the border color of the rejection button.
Frontend Display
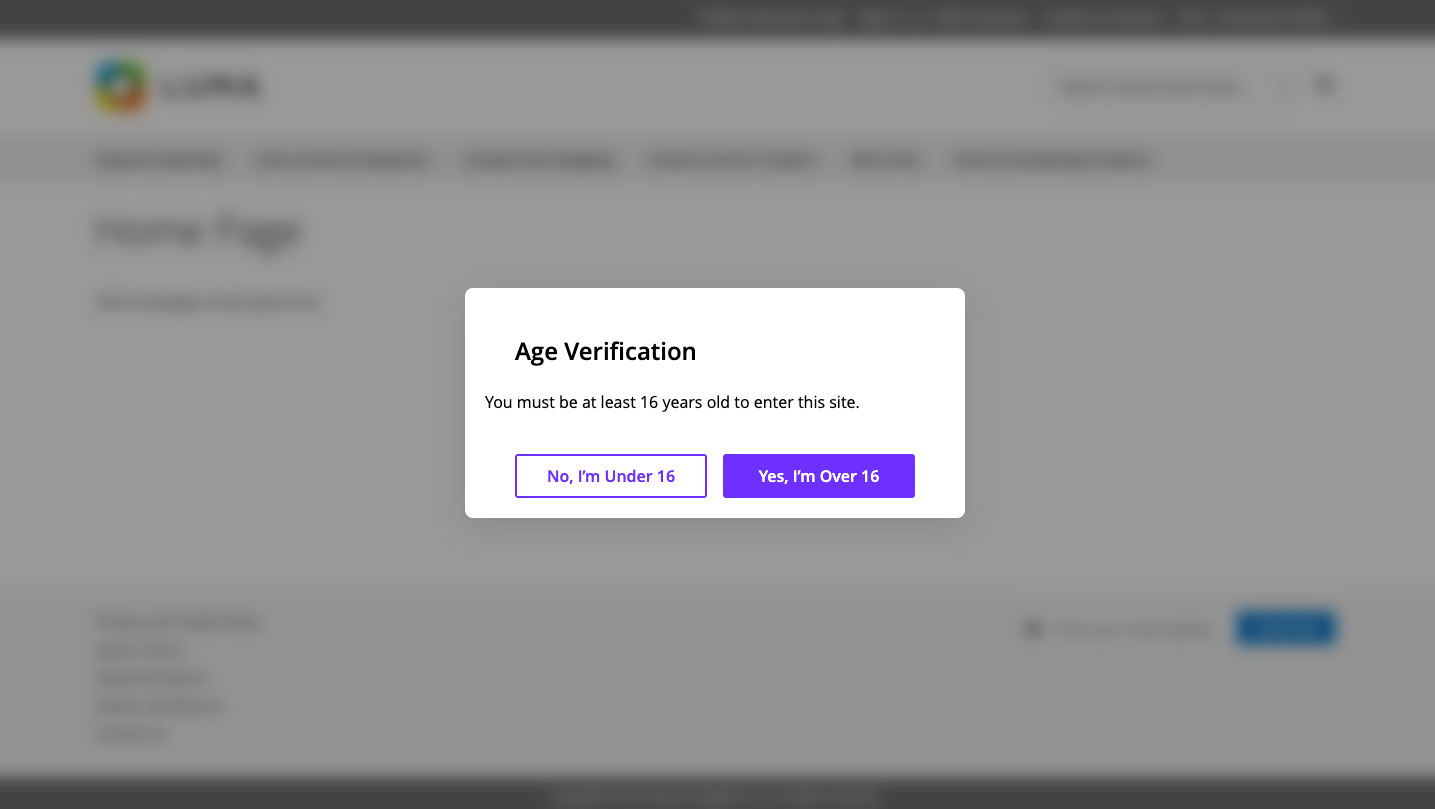
Once configured, the Age Verification popup will securely block access to your store for new visitors until they confirm they meet the legal age requirements.