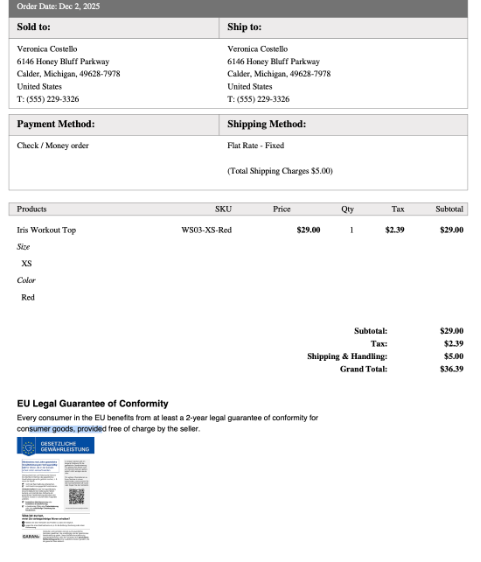
EU Guarantee Notice & GARAN Label for Magento 2 - User Guide
Extension Installation
For Magento Marketplace customers
- Find the Composer name (
meetanshi/magento-2-eu-legal-guarantee) and version of the extension in itscomposer.jsonfile. - Log in to your server via SSH and run:
composer require meetanshi/magento-2-eu-legal-guarantee
- Enter your Magento authentication keys when prompted (public key = username, private key = password).
- Verify the module is recognized:
php bin/magento module:status Meetanshi_EuGuarantee
- Enable the module and run setup:
php bin/magento module:enable Meetanshi_EuGuarantee
php bin/magento setup:upgrade
For Meetanshi customers
- Extract the ZIP file and upload the extension to the root of your Magento 2 directory via FTP.
- Log in to your server via SSH and run:
php bin/magento setup:upgrade
Deploy static content and flush cache (both methods)
php bin/magento setup:static-content:deploy -f
php bin/magento cache:flush
Extension Configuration
Step 3. Enable Module: Set to Yes to activate the extension; No disables it. The demo currently shows Yes at Default Config scope.
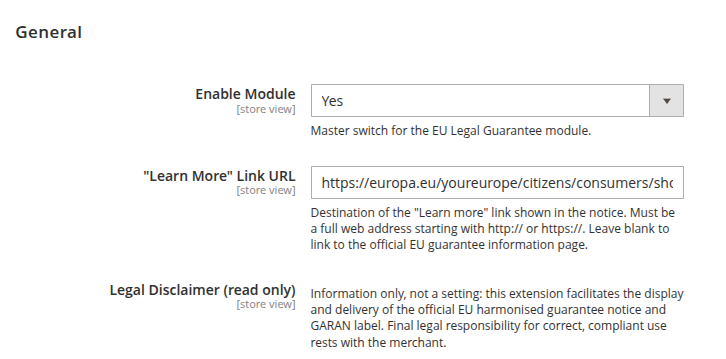
- “Learn More” Link URL: Provide a full http(s) address for the consumer information link. The demo points to a German Your Europe page. Leave blank only if the configured fallback is appropriate for your store. The legal disclaimer shown in the configuration is informational, not a field to edit.
3. Set up the harmonised notice
Step 4. Open Harmonised Notice: Open Legal Guarantee of Conformity and set Enable Harmonised Notice to Yes if the store needs the notice displayed. The demo shows Yes for the email and invoice-PDF switches, with invoice placement at Bottom; verify the actual output before publishing.
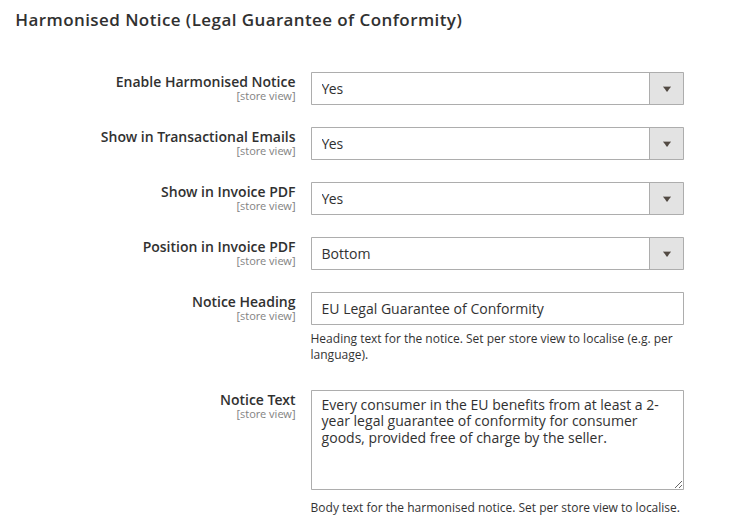
Step 5. Notice Heading and Text: Write and review the text for each store language.
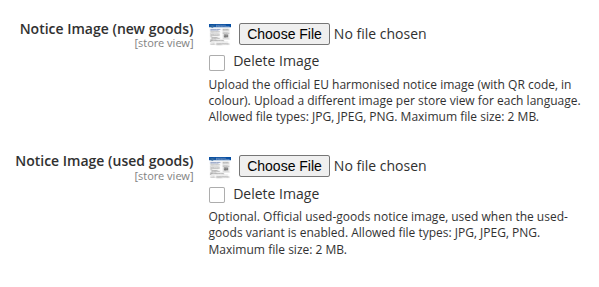
Notice Image (new goods): Upload the corresponding official colour artwork with QR code.
Notice Image (used goods): Optional artwork for the used-goods variant. The demo accepts JPG, JPEG or PNG up to 2 MB for each. Do not assume an image shown in the demo is the correct language or legally sufficient for your store.
4. Set up storefront display
- Step 6. Storefront Display: Open Storefront Display. The demo offers separate switches for the product, cart and checkout notice, plus a product-page GARAN switch. Keep notice placement visible before purchase, then test every relevant sales channel and store view.
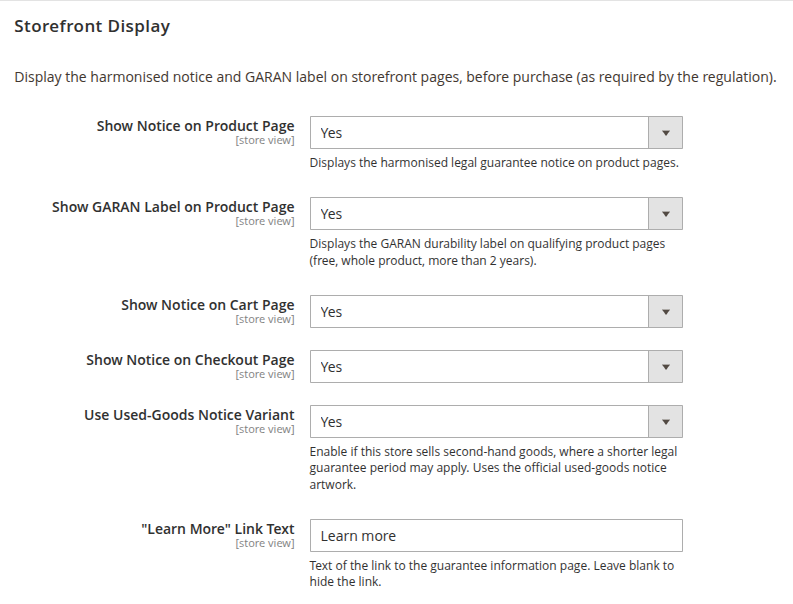
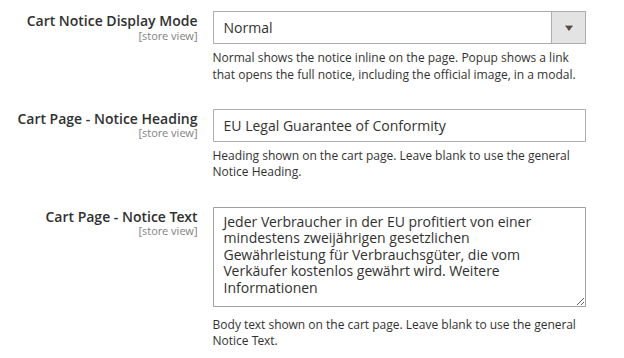
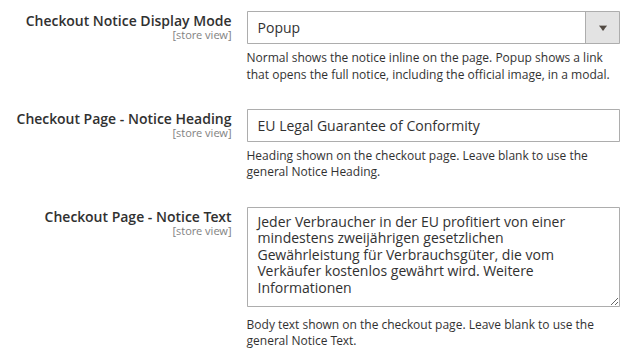
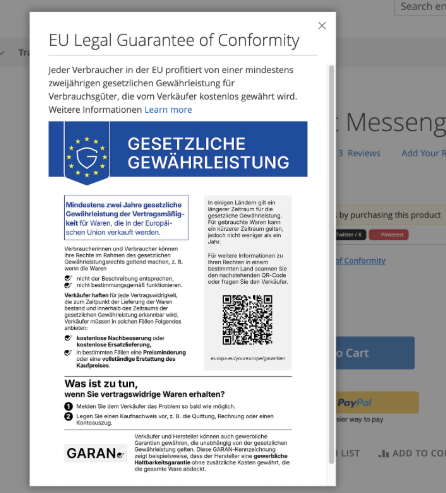
Step 7. Display Modes: Product Notice Display Mode, Cart Notice Display Mode and Checkout Notice Display Mode: Normal renders inline; Popup opens the full notice in a modal from a link. The demo currently shows Popup, Normal and Popup respectively. Each page also has its own Notice Heading and Notice Text override; leave an override blank to use the general notice text where the field help says so.
Step 8. Used-Goods Notice Variant: Choose Yes only when the store’s used-goods policy and artwork have been reviewed. The demo shows Yes, but this is an example configuration, not advice for every merchant. “Learn More” Link Text controls the consumer-facing link label; blank hides that link according to the field help.
5. Set up the GARAN commercial guarantee
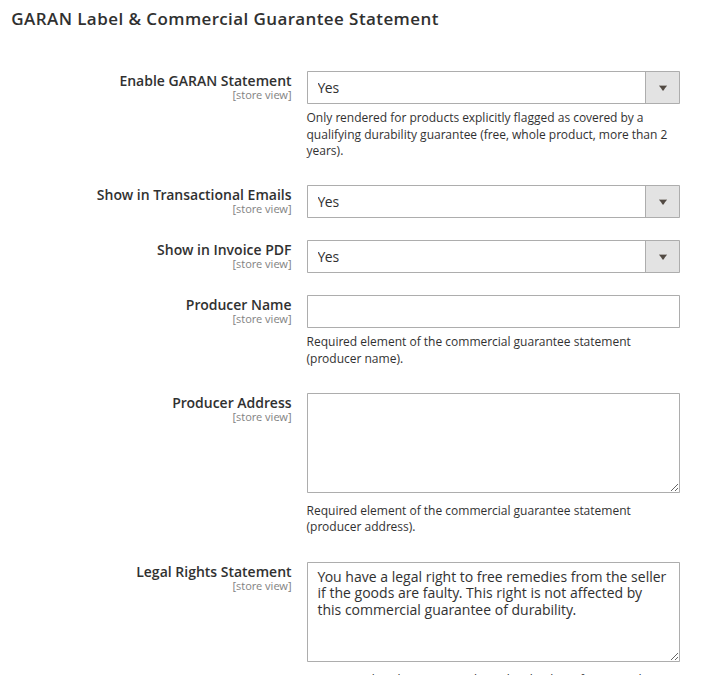
- Step 9. GARAN (Commercial Guarantee of Durability): Enable GARAN Statement controls the statement. The demo says it is rendered only for products explicitly flagged as covered by a qualifying durability guarantee. The demo shows separate email and invoice-PDF switches. Verify the product-level flag and the generated statement in a safe staging test.
Statement fields
Step 10. Producer Name and Address: Enter the producer’s verified identity and address. Both are empty in the demo, so its statement is not release-ready.
Legal Rights Statement: Explain that the consumer’s free remedies from the seller are unaffected by the commercial guarantee.
Steps to Use the Guarantee: Give actual claim steps and contact route.
Guarantee Conditions: Give the complete reviewed conditions; empty in the demo.
Step 11. GARAN Label Image: Use the official colour label for the store language; the demo allows JPG, JPEG or PNG up to 2 MB.
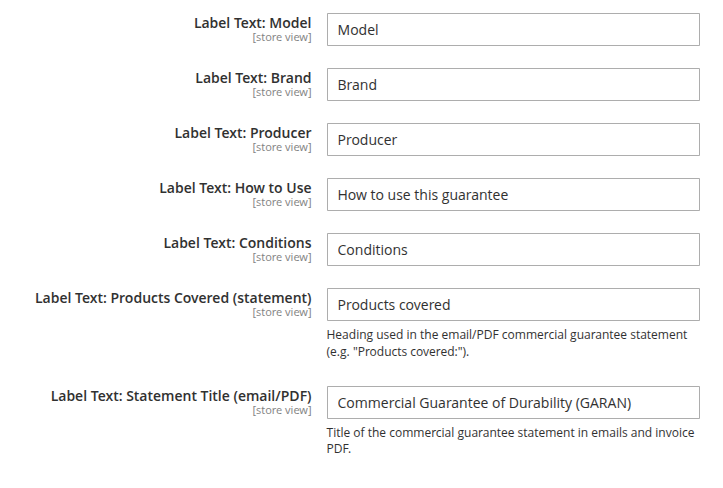
Label Text: Title, “Details” Toggle, Years Suffix, Model, Brand, Producer, How to Use, Conditions, Products Covered (statement), and Statement Title (email/PDF) control display wording. The Years Suffix field uses
%1as its duration placeholder. Translate these labels per store view.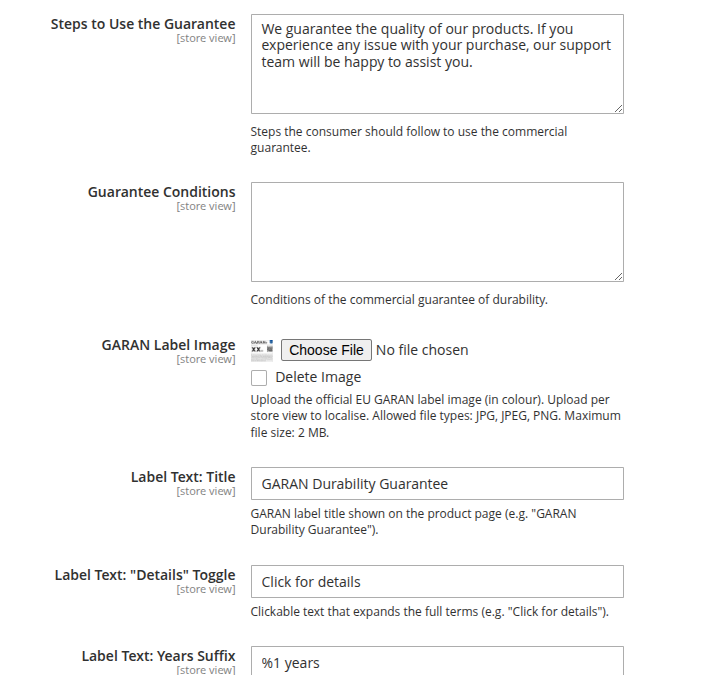
Product-level eligibility
- Step 12. Product Eligibility: In each eligible product’s EU Guarantee section, the screenshot shows Covered by EU GARAN Durability Guarantee, GARAN Duration (years), GARAN Brand / Trademark, GARAN Model ID and GARAN Covers Whole Product. Enter the real producer guarantee duration (more than two years), the identifying details and whole-product coverage only when supported by the producer’s actual terms. The screenshot shows 3 years and Yes as examples, not verified commitments. Do not mark an ineligible product covered.
6. Check the customer experience
- Step 13. Review Products: Review a qualifying and a non-qualifying product in each target language. Check the product page notice and GARAN details, cart and checkout notice, and the Learn more destination. Open every popup and verify the whole notice image fits and remains readable. Inspect transactional emails and invoice PDFs if enabled. Do not submit a real order just to test this guide.
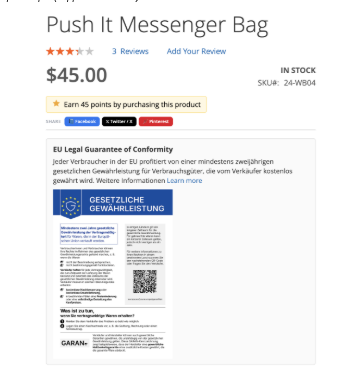
- Step 14. Reference Examples: The supplied screenshots show a German notice in a product modal and inline product/cart views, plus a checkout modal. They are reference examples, not proof that the current storefront, emails or PDF behave the same way. The final supplied screenshot is rotated; it remains uncropped in the reference section.
- Product notice inline example
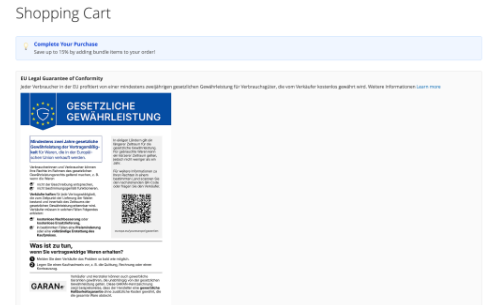
- Cart notice example
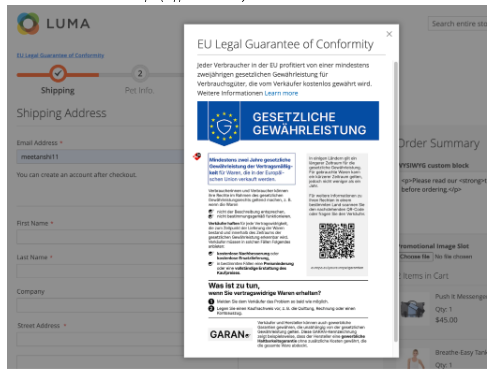
- Checkout notice popup example